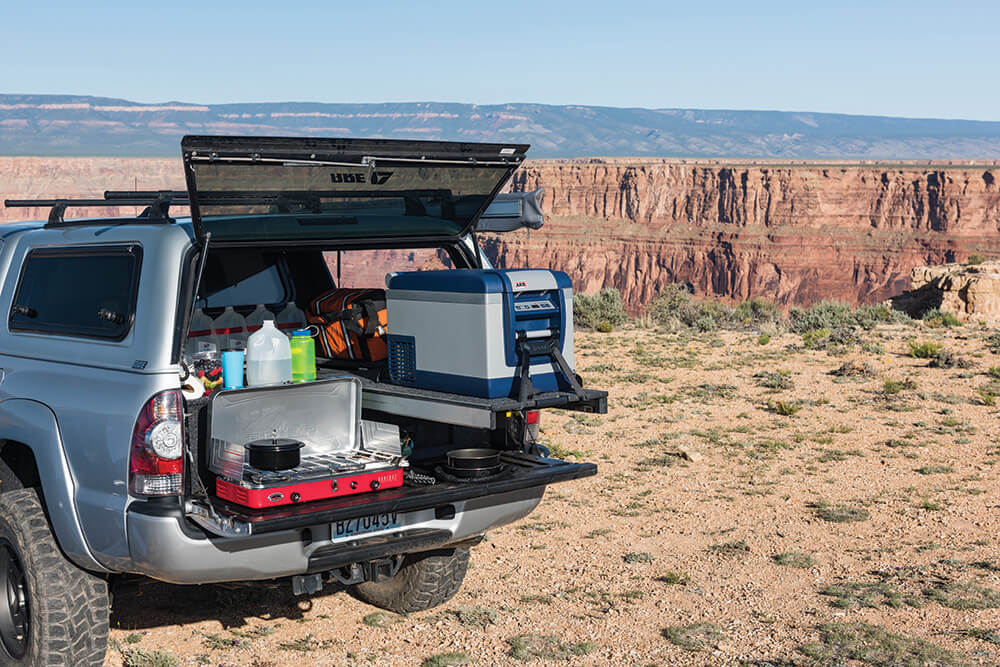
Up next Prepare Yourself and Your Rig for Any Desert Adventures Published on August 28, 2019 Author Jonathan Wong Tags 2006 Toyota Tacoma, Alex Chan, ARB, BAMF, Bay Area Metal FAb, Cobra radio, deaver springs, Factor 55, Falken Wildpeak AT3w, GrillCraft, mule expedition outfitters, Pelfreybilt, Prinsu, Taco, Toyota Tacoma, Share article Facebook 0 Twitter 0 Mail 0 A 2006 Toyota Tacoma Built To Do It All King Taco Compared to a lot of the more traditional off-road vehicles you could take under your wing, the 2006 Toyota Tacoma has quickly become one of the best selections you could opt for, and for a perfectly good reason (amongst many): they’re pretty f’in awesome. I spent some time in the latest model TRD Sport last year on a couple occasions—one for mostly city cruising evaluations and the other where it was better destined to go, completely off pavement and in the dirt for a gig at the King of the Hammers. It was beyond comfortable and fit my vibe more than I feel a Jeep JK would while also being modification friendly. The Taco seems to be that type of truck for most beginning enthusiasts: lift it, install a decent set of wheels, throw your stuff in and off you go. A Pelfreybilt front bumper with BAMF skids and ADV fenders give this Taco a beefy AF look. Off the Deep End For Alex Chan, this was certainly the case—to find a truck with multi-purpose: comfort on the daily commute and comfort when it’s time to go play on the weekends. Though it is an older generation model, it’s still a very formidable Tacoma. At first he thought a lift kit and wheels would be enough to start off with, but the forums, they sucked him in good. Alex says, “I saw a few other builds on Tacomaworld, which got some ideas going.” Subscribe to our weekly newsletter After experiencing his first group trail run with some local off-road enthusiasts, he started to make more changes, modifying by specific needs and wants that each trip produced. One look at Alex’s Tacoma and it’s clear: he’s gone way off the deep end from simple and “good enough” into “don’t mess with this” territory. Scan his Instagram if you don’t believe us… “I can take it on mild trails but can easily go fast on dirt and desert roads. It can haul a lot of stuff and be out for extended periods of time, but usually I daily drive it.” Gone is the simplistic look and feel of the original Taco shell; now it’s prepped for doomsday, “kill the walkers” action, though Alex made no mention of it being destined for such type of messy activity. “The truck can do it all…to an extent,” he says. “I can take it on mild trails but can easily go fast on dirt and desert roads. It can haul a lot of stuff and be out for extended periods of time, but usually I daily drive it.” Given the amount of gear we see it moving around in these photos, “doing it all” is an understatement. Having owned the pickup for some time now, Alex continues to make tweaks to the Taco with each trip to the outdoors. In the beginning, taking a few mountain bikes and friends to go riding required little thought, but trail runs demand more attention. “If I knew then what I know now, I’d have started with my current setup and made adjustments from there instead,” he says. “That would’ve saved lots of time and money over the long run.” In fact, astute Tread readers may—or may not, since it looks so different—recall this truck from our premier issue. The makeover makes it completely indistinguishable from its previous life. That’s how real-world experience can evolve a build. Not just a weekend warrior. When not eating up dirt trails, Chan drives his Taco daily. Let’s Go Places With a 2006 Toyota Tacoma under your control, how could one not follow Toyota’s current slogan? Alex’s Tacoma has been on several trips since purchasing it certified pre-owned back in 2012 with only 40K on the odometer. “For $25K, it was in decent condition,” he says. “All it needed was a little TLC but overall it was a good starting platform.” So far, some of his favorite getaway destinations include some of the forest areas that lie just north of home in the outskirts of the Bay Area, including Slick Rock (not to be confused with the popular ‘80s rapper), Eagle Lakes, Deer Valley and as far out as Joshua Tree. His longest trip took Alex to Grand Canyon North Rim, where it wasn’t just a long drive to get there, but a couple hundred miles were spent off-road driving through the area. “One look at Alex’s Toyota Tacoma and it’s clear: he’s gone way off the deep end from simple and “good enough” into “don’t mess with this” territory.” As the truck sits now, its current setup is the result of recent trips that involved lots of off-road maneuvers that covered plenty of distance and camping at remote locations. The truck bed houses the Freespirit Recreation Adventure Series 49 roof top tent and annex room, which is equipped with a solar panel to provide power solutions where power’s in limited supply or simply not available by traditional means. Other creature comforts include the 50-quart ARB fridge that’s mounted to an ARB fridge slide for easy access to cold beverages and food storage. A BAMF bed rack at the rear and a Prinsu Design roof rack up front help the 2006 Toyota Tacoma house enough gear for extended trips. The truck bed houses a Freespirit Recreation Adventure Series 49 roof top tent and annex room. The Build To help give the factory 4.0L V-6 a little more power, Alex bolted on a supercharger and intake kit, both from Toyota’s in-house TRD division, better known to enthusiasts as the Toyota Racing Division. A custom-made engine snorkel ensures that not only fresh, but also clean, air is delivered to the intake, while preventing other dirt or debris from entering during off-road excursions. A little more power is extracted with the addition of Shortie headers from Doug Thorley. “As the truck sits now, its current setup is the result of recent trips that involved lots of off-road maneuvers that covered plenty of distance and camping at remote locations.” Inside, the Taco’s cabin is decorated with enough flair to drive a TGIF employee insane. The ceiling is covered from front to back with various morale patches from his friends and his travels. An AutoMeter boost gauge provides detailed supercharger PSI readings from the TRD blower, and basic necessities, such as a Cobra CB and Yaesu ham radio are on call for use whenever he needs to reach out to any other friends on the trail to warn them of any oncoming hazards or to shoot the shit. Chan continues to make tweaks to the Taco with each trip to the outdoors. This mean stance is thanks to a Dirt Designs long-travel race kit coupled with King coilovers in the front and a DMZ SUA long-travel kit with Deaver HD long travel springs and King triple bypasses and air bumps in the rear. From Slick Rock to Joshua Tree to the Grand Canyon, Chan and his Taco has been there. The only question for the pair is, “Where to next?” 17×8.5-inch Stealth Custom Series Ray 10 wheels and 35-inch Falken Wildpeak tires give the Taco plenty of grip. Tackling off-road terrain and standard roadways is a fairly basic suspension setup with highly advanced technology. The front end uses a Dirt Designs long-travel race kit coupled with King coilovers and triple bypasses, while the rear uses a DMZ SUA long-travel kit with Deaver HD long travel springs and King triple bypasses and air bumps. Alex’s Taco relies on a 6-piston big brake kit from StopTech to help slow it down, and sits on a set of 17×8.5-inch Stealth Custom Series Ray 10 wheels with 35-inch Falken Wildpeak tires. Giving the Taco a more beefed-up appearance are a Pelfreybilt front bumper with BAMF skids, ADV fiberglass front and rear fenders and a Dirt Designs rear bumper. Keeping things lit AF (yes, we’re using any opportunity to use that word whenever possible) are plenty of lighting accessories from Rigid and SRM, as well as replacement Depo black headlight housings that have been retrofitted with LED headlight bulbs from PIAA. In Closing Alex set out to build a multi-purpose rig that can be daily driven as well as take on some serious trails when desired. After some trial and error and a whole lot of hands-on experience, we’d say that he not only accomplished, but dominated his goal. This Taco certainly has versatility in spades with the looks to match. “The make over makes it completely indistinguishable from its previous life. That’s how real-world experience can evolve a build.” To see some crazy off-road eye-candy featuring Alex’s Toyota Tacoma in various terrains and weather conditions, follow him on Instagram at @sytfu510, and be sure to let him know that you found him through your friends at Tread! We’re digging the morale patch covered headliner. The bed has enough storage capacity for essential gear and tools and then some. The cockpit’s layout is outfitted for function. Cobra CB and Yaesu ham radios handle comms while RAM mounts keep electronic devices within reach. _______________________________________________________________________ UPGRADES 2006 Toyota Tacoma Engine: TRD supercharger and intake kit; custom engine snorkel; Doug Thorley Shortie headers; Bonzen polyurethane motor mounts Suspension: (front) Dirt Designs +3.5” long travel race kit; King 2.5×8 coilovers and triple bypasses; (rear) Infamous Metal Works fully boxed frame and bed cage; DMZ SUA long travel kit; Deaver HD long travel springs; King 16” triple bypasses and 2.0 air bumps Drivetrain: B&M transmission cooler; ARB front/rear Air Lockers with ARB twin air compressor and air-up kit; G2 4.56 gears,StopTech 6-piston big brake kit Wheels & Tires: 17×8.5” Stealth Custom Series (SCS) Ray 10 wheels; Falken Wildpeak ATW3 35×12.5×17 tires Armor: Pelfreybilt Hybrid front bumper and aluminum gas skid; Dirt Designs rear bumper; BAMF (Bay Area Metal Fab) sliders, skids, bed rack and diff skid; ADV fiberglass front/rear fenders; OEM Toyota Quicksand paint and bodywork by H&H Auto Lighting: Rigid 40” Radiance roof rack, Dually ditch lights (hood), SAE fog lights and 20” amber (front bumper), SRM x4 (bed rack) and SRM amber x2 (rear), and red chase light (rear); Depo black housing headlights; PIAA LED headlight bulbs; MattGecko bed LED light kit Accessories: GrillCraft MX grille with inserts; Warn M8000S with wireless control; Pelfreybilt fairlead; Factor 55 flat link; Rubbermaid Action Packers; Blue Ridge overland air tool bag and molle panels; ARB fridge slide and 50qt fridge; Plano rifle cases mounted on Prinsu roof rack; AutoMeter boost gauge; Scangauge monitor; dash mounted Cobra CB radio and Yaesu 2M HAM radio; Genesis off-road dual battery controller; Optima yellow top batteries (x2); Ceramic PRO 9H coating by Omega Werks; Freespirit Recreation Adventure Series 49 automatic roof top tent with solar panel, annex room, ready light and 4-foot awning; Bird Dawg Industries Tech Deck with RAM mounts for phone/tablet; OEM Toyota rubberized flooring; RinseKit USA portable water system; ProEagle off-road racing jack; Krazy Beaver Tools shovel; Gerber/Fiskars axe; RotopaX fuel/water/storage packs; TRED4x4 recovery ramps; Mule Expedition Outfitters billet hitch recovery point; On Board CO2 air system. FREQUENTLY ASKED QUESTIONS What are the largest tire sizes that can be used on stock suspension? Largest Tire Sizes on Stock Suspension When upgrading your vehicle’s tire size while keeping the original suspension, it’s essential to know the largest possible options that are both safe and efficient. Here’s a breakdown of what’s generally acceptable: Main Considerations Vehicle Model and Year: Different models and years may have slight variations in suspension clearance. Rubbing and Trimming: Larger tires might require you to trim some parts of your vehicle to avoid rubbing against the fenders or inner wheel well. Speedometer Accuracy: Larger tires can affect the accuracy of your speedometer. Calibration may be necessary. Standard Guidelines For most vehicles with stock suspension, here’s a quick reference: Compact SUVs and Crossovers: Typically can handle up to 30-inch tires. Mid-Size SUVs and Trucks: Usually accommodate up to 32-inch tires without significant modifications. Full-Size Trucks: Often capable of fitting up to 33-inch tires. Popular Tire Sizes Compact SUVs: 225/70R16 or 235/70R16 are common choices. Mid-Size SUVs and Trucks: 265/70R17 or 275/70R17 usually fit well. Full-Size Trucks: 285/70R17 or 295/70R17 are frequently used. Real-World Examples and Tips Common Fitment: For mid-size trucks, a popular option without requiring a lift is the 265/75R16. It offers a balance between increased ground clearance and minimal modifications. Slightly Larger Options: If you’re willing to make minor adjustments, like trimming the fender liners, a tire size of 285/75R16 can often be accommodated. Full-Size Upscale: On full-size trucks, moving up to a 295/70R17 is feasible but watch for any rubbing during turns or while off-roading. Important Reminders Consult Your Manual: Always refer to your vehicle’s owner manual for specific recommendations. Seek Professional Advice: For precise fitment and to avoid potential issues, consult with a tire specialist or professional mechanic. Test Fit: Before purchasing, do a test fit to confirm the tires will work without issues. Upgrading to larger tires can enhance your vehicle’s appearance and off-road capabilities. However, it’s vital to ensure the new size you choose doesn’t compromise safety or vehicle integrity. What are the features of the Midland MXTA26 MicroMobile Whip Antenna? Features of the MXTA26 MicroMobile Whip Antenna Ready to upgrade your communication setup? The MXTA26 MicroMobile Whip Antenna offers a range of standout features that significantly enhance your signal strength and coverage: Quadruple Signal Output Experience a significant boost in signal output. The antenna’s design ensures you achieve up to four times the standard signal strength, making it ideal for both city and off-road adventures. High Gain Performance This antenna boasts a 6dB gain, ensuring a clearer and more reliable connection over extended distances. Enjoy uninterrupted communications even in challenging terrains. Optimal Length At 32 inches, the antenna strikes a perfect balance between performance and practicality. It’s long enough to capture and transmit strong signals, yet compact enough to fit seamlessly on your vehicle. Durable Construction Crafted from high-quality materials, this antenna is built to withstand the elements. Whether you’re facing heavy winds, rain, or rugged conditions, it remains stable and functional. Easy Installation Designed for user convenience, the antenna includes all necessary components for a hassle-free setup. Simply follow the straightforward instructions, and you’ll be up and running in no time. Universal Compatibility The MXTA26 is compatible with a wide range of MicroMobile radios and other communication devices, making it a versatile addition to any setup. Key Benefits Enhanced Signal Strength: Quadruple your typical signal output for clearer communications. Robust Design: Withstands harsh environmental conditions. User-Friendly: Simple installation process. Upgrade your communication capabilities with the MXTA26 MicroMobile Whip Antenna, and stay connected wherever your adventures take you. What are the features of the Wireless OBD2 Scanner? Features of the Wireless OBD2 Scanner Compatibility Fully compatible with both Android and iPhone devices, providing flexibility regardless of your smartphone choice. Advanced Functionality Bidirectional Scan Capabilities: Allows for both reading and sending commands to the vehicle’s system. All System Diagnostics: Conducts comprehensive diagnostics across all vehicle systems, ensuring no issue is overlooked. Maintenance and Reset Functions 21 Reset Options: Includes essential resets like oil light reset and electronic parking brake reset, making routine maintenance easier. ABS Bleed: Ensures your anti-lock braking system is functioning correctly by removing any trapped air in the brake lines. Updates 2024 Newest Version: Features the latest improvements and functionalities, ensuring up-to-date performance. Free Updates: Receive ongoing software updates at no additional cost, keeping your scanner current with the latest vehicle models and diagnostic protocols. User-Friendly Design Wireless Connectivity: Uses Bluetooth for a seamless and cord-free diagnostic experience. Compact and Portable: Its small size makes it easy to carry and store, ideal for both professional and personal use. Interface Upgraded User Interface: Enhanced for a more intuitive user experience, making it easier to navigate and operate. Whether you’re a professional mechanic or a car enthusiast, this wireless OBD2 scanner is loaded with features to help you maintain and diagnose your vehicle efficiently. What is the Magnefine Magnetic Inline Transmission/Power Steering Filter used for? The Magnefine Magnetic Inline Transmission/Power Steering Filter is an essential component designed to enhance the longevity and performance of your vehicle’s transmission and power steering systems. This filter plays a crucial role in maintaining the cleanliness and efficiency of the fluid circulating within these systems. Key Uses: Contamination Prevention: The primary function of this filter is to prevent harmful contaminants, such as metal particles and debris, from circulating through the transmission and power steering systems. These contaminants can cause significant wear and tear over time, leading to expensive repairs. Magnetic Filtration: Equipped with a powerful magnet, the filter attracts and captures tiny metallic particles that are often too small for conventional filters to trap. This ensures that even the finest particles are removed from the fluid, enhancing overall system cleanliness. Fluid Life Extension: By effectively filtering out impurities, the Magnefine Magnetic Inline Filter helps extend the life of the transmission and power steering fluids. Clean fluid not only ensures smoother operation but also reduces the likelihood of system malfunctions. System Performance: Cleaner fluid allows for more efficient operation of both the transmission and power steering systems. This can result in smoother gear shifts and more responsive steering, ultimately improving the driving experience. Maintenance Reduction: Regular use of this filter reduces the need for frequent fluid changes and system flushes. This means less maintenance for your vehicle, saving you time and money in the long run. Installation and Compatibility Installation Ease: The filter is designed for simple, inline installation, typically involving cutting a section of the fluid line and inserting the filter. This process can be performed with basic tools and requires minimal technical knowledge. Versatility: Compatible with a variety of vehicle makes and models, the Magnefine Magnetic Inline Filter can be used in both domestic and imported cars, trucks, and SUVs. Conclusion The Magnefine Magnetic Inline Transmission/Power Steering Filter is a vital tool for maintaining the efficiency and longevity of your vehicle’s systems. By preventing contamination, enhancing fluid life, and improving system performance, it offers an affordable and practical solution to common automotive issues. What are the features of the CHAOGANG Car Sound Deadener Mat? Key Features of This Car Sound Deadener Mat Superior Noise Reduction: This sound deadening mat excels at minimizing road noise and vibrations, ensuring a quieter and more peaceful drive. High-Performance Insulation: Constructed with closed-cell foam, the mat offers remarkable heat insulation to keep your vehicle’s interior cool and comfortable. Generous Coverage: Boasting an expansive 37 square feet coverage, this set includes 29 pieces, each measuring 15.7 inches by 11.8 inches. It’s designed to fit various areas within your car seamlessly. Self-Adhesive Backing: Installation is straightforward thanks to the powerful self-adhesive layer. Just peel and stick—no additional tools or adhesives required. Durability and Flexibility: With a thickness of 196 mil, the mat not only provides exceptional dampening but is also flexible enough to mold to the contours of your vehicle. Versatile Application: Perfect for a wide array of vehicles, this sound deadener mat can be used on floors, doors, trunk areas, and even the hood. By leveraging these features, this car sound deadener mat significantly enhances your driving experience, offering both comfort and peace of mind. What are the uses of the Lisle CV Boot Clamp Pliers? Uses of CV Boot Clamp Pliers CV boot clamp pliers are essential tools in automotive repair and maintenance. These specialized pliers serve several key functions: Securing CV Boot Clamps: The primary use of these pliers is to tighten and secure clamps around CV boots. These boots protect the constant velocity (CV) joints, preventing dirt, debris, and moisture from causing damage. Preventing CV Joint Wear: Properly clamped CV boots ensure that the CV joints remain lubricated, reducing wear and tear. This extends the lifespan of the joints and maintains smooth vehicle operation. Easy Access in Tight Spaces: Designed for use in automotive repair, CV boot clamp pliers often feature long, slim handles that provide access to difficult-to-reach areas. This makes it easier to apply the necessary torque to secure the clamp. Versatility: Beyond CV boots, these pliers can also be used for various types of ear-type hose clamps in other automotive applications. This makes them versatile tools for any mechanic’s toolbox. Durability and Reliability: Made from high-quality materials, they offer durability and a reliable grip, ensuring that clamps are fastened securely and will not slip during installation. Key Features Ergonomic Design: Most CV boot clamp pliers are ergonomically designed to reduce hand fatigue during prolonged use. Corrosion Resistance: Constructed with rust-resistant materials to withstand the rigors of frequent use. Precision Jaws: Engineered to apply uniform pressure without damaging the clamp or the boot. In summary, CV boot clamp pliers are indispensable for anyone involved in automotive repair, offering precision, durability, and ease of use for securing clamps that protect vital CV joints. What are the features of the ESI Super Cap Seal? Features of the ESI Super Cap Seal Dimensions and SizeThe ESI Super Cap Seal measures 23 feet in length, making it versatile for various applications. With a width of 1 1/2 inches and a height of 1/2 inch, it perfectly fits caps that weigh 200 lbs or less. Material QualityCrafted from high-quality EPDM rubber, this seal is designed for durability and long-term use. EPDM rubber is known for its excellent resistance to weather, UV rays, and ozone, ensuring a longer lifespan and reliable performance. Application and UseIdeal for use with truck caps and camper shells, it provides a snug fit that effectively seals out moisture and dust. This ensures the interior of your vehicle or camper remains clean and dry, even in harsh weather conditions. Ease of InstallationThe product is designed to be user-friendly and easy to install. It comes with an adhesive backing that simplifies the installation process, allowing you to set it up without professional help. Performance and DurabilitySpecifically constructed to handle caps weighing up to 200 lbs, it maintains its form and effectiveness under heavy loads, ensuring a secure and tight seal. Key Benefits Weather-Resistant: Stands up to UV rays and extreme weather. Easy Installation: Adhesive backing simplifies application. High Durability: Made from robust EPDM rubber. Versatile Fit: Suitable for a wide range of applications with its generous dimensions. By focusing on these features, you can confidently rely on the ESI Super Cap Seal to deliver reliable sealing performance for your truck caps and camper shells. What vehicles are compatible with the K&N Premium Oil Filter? Vehicle Compatibility for K&N Premium Oil Filter HP-1002 If you’re wondering whether the K&N Premium Oil Filter HP-1002 is the right fit for your vehicle, this guide will help clarify its compatibility. This premium oil filter is engineered to work seamlessly with several vehicle models, ensuring optimal performance and protection for your engine. Compatible Vehicle Makes: Ford: Various models, such as sedans, trucks, and SUVs. Lincoln: Selected high-performance and luxury vehicles. Toyota: Multiple models including popular compact cars and larger vehicles. Volkswagen: Certain models primarily comprising sedans and compact cars. Detailed Compatibility: For a comprehensive list of compatible vehicle models, refer to the product description directly. The K&N Premium Oil Filter HP-1002 is designed to fit multiple engines across these brands, offering a wide range of applications. If in doubt, checking the filter’s compatibility with your specific vehicle model before purchasing is always a good practice. Why Choose K&N Premium Oil Filter HP-1002? Engine Protection: Designed to capture harmful contaminants, extending the life of your engine. Performance: High-flow design maintains excellent oil pressure and engine performance. Durability: Built to withstand demanding driving conditions and prolonged use. The K&N Premium Oil Filter is an excellent choice for drivers seeking reliability, enhanced engine protection, and high performance. Make sure to verify its compatibility with your specific vehicle model to ensure optimal results. What is the uxcell Jqx-13F DC Power Relay used for? The Jqx-13F DC 12V Coil 8 Pin DPDT Power Relay is primarily used to control high-power electrical devices through a low-power signal. This makes it an essential component in both industrial and DIY applications where reliable switching is crucial. Key Uses of the Jqx-13F DC Power Relay: Industrial Automation: Often employed in manufacturing systems to automate machinery, ensuring seamless operation and enhanced safety. Home Automation: Utilized for controlling household appliances like heating systems, lighting, and garden irrigation setups. Automotive Applications: Helps manage various vehicle electronics, from lighting systems to security alarms. DIY Projects: Ideal for hobbyists looking to integrate advanced control mechanisms into their electronics projects. Features and Benefits: Dual Pole Dual Throw (DPDT): Allows switching between two different states, adding flexibility to your project. 12V DC Coil: Operates efficiently with a 12V DC power supply, making it compatible with a wide range of devices. 8 Pin Configuration: Simplifies the connections and increases the ease of integration into various systems. Technical Specifications: Coil Voltage: 12V DC Type: DPDT (Double Pole Double Throw) Pin Count: 8 By integrating a versatile power relay like the Jqx-13F into your setup, you can streamline operations and enhance the efficiency of electrical systems, whether for industrial, automotive, or home automation purposes. What are the applications of the 3M VHB Double Sided Foam Adhesive Sheet Tape? Versatile Applications of Double-Sided Foam Adhesive Sheet Tape Double-sided foam adhesive sheet tape is known for its strong bonding capabilities, making it useful for various applications across different industries. Here are some common uses: Automotive Industry Mounting Trim and Moldings: Perfect for securely attaching interior and exterior trim, emblems, and moldings. Weatherstripping: Ensures tight seals, enhancing the vehicle’s insulation and resistance to elements. Home Improvement and DIY Projects Wall Decor: Ideal for hanging pictures, mirrors, and decorative items without nails or screws. Furniture Assembly: Helps in securing furniture joints and adding extra support to DIY build projects. Electronics Device Assembly: Commonly used in the assembly of laptops, smartphones, and other electronics due to its ability to provide a strong, long-lasting bond. Component Mounting: Assists in mounting components like screens and circuit boards within devices. Industrial Applications Panel Bonding: Used for attaching panels in manufacturing processes, providing a durable and strong bond. Signage: Widely used for mounting signs, ensuring they stay securely in place even in outdoor settings. Key Benefits Strong Bond: Provides a high-strength bond that can withstand heavy loads and various environmental conditions. Versatility: Can be used with different materials such as metal, glass, plastic, and wood. Easy Application: Simplifies the process of attaching items without the need for tools or hardware. By utilizing this double-sided foam adhesive sheet tape, you can achieve reliable and long-lasting results across multiple applications, making it an essential tool for both professionals and DIY enthusiasts. What is the M18 Cordless Lithium-Ion Circular Saw used for? The M18 Cordless Lithium-Ion Circular Saw is designed for a wide range of cutting applications. Here’s how it can serve your needs: Key Applications: Lumber Cutting: Perfect for slicing through 2x4s and other common lumber sizes. Plywood and Sheet Goods: Easily cuts through plywood, MDF, OSB, and other sheet materials. Precision Cuts: Ideal for making precise, straight cuts for trim, moldings, and other detailed woodworking projects. Framing and Construction: A valuable tool for framing walls, cutting rafters, and general construction tasks. Roofing: Effective for cutting roofing materials like asphalt shingles and underlayment. Why Choose This Saw? Portability: Being cordless, it offers the freedom to move around the job site without being tethered to an outlet. Power and Performance: Despite its compact size, it delivers powerful cutting capabilities, rivaling many corded alternatives. Versatility: Suitable for professional contractors and DIY enthusiasts alike. In essence, the M18 Cordless Lithium-Ion Circular Saw is an all-around tool designed to make cutting tasks quicker and more efficient, whether you’re working on a small home project or a large construction job. What vehicles can the TPMS Sensor 315MHz be used for? Compatible Vehicles for the TPMS Sensor 315MHz The TPMS Sensor 315MHz is a versatile tire pressure monitoring sensor compatible with a variety of vehicles. Notably, it fits several popular car models including: Mid-size Sedans: Models such as those produced between 2007 and 2013. Trucks and SUVs: Ideal for popular truck models from the same period. Hybrids: Designed to work effectively with hybrid vehicles. Compact Cars: Ensuring compatibility with multiple compact car models within the specified years. This sensor serves as a direct replacement for parts PMV-107J, 42607-33021, 42607-06011, and 42607-33011, making it a reliable option for ensuring optimal tire pressure monitoring across different car categories. What is the Hayden Automotive 678 Universal Rapid-Cool Transmission Cooler used for? The Purpose of the Hayden Automotive 678 Universal Rapid-Cool Transmission Cooler The Hayden Automotive 678 Universal Rapid-Cool Transmission Cooler is designed for automotive enthusiasts and vehicle owners who need an efficient way to keep their transmission temperatures in check. It’s particularly valuable for those who frequently engage in activities that place extra stress on their transmission. Key Uses: Prevent Overheating: By improving the cooling efficiency, this cooler helps in preventing the transmission from overheating, which can lead to costly repairs. Extending Transmission Life: By maintaining optimal transmission temperatures, this cooler can significantly prolong the life of your transmission. Support for High-Performance Applications: Ideal for vehicles used in towing, hauling, or other high-stress activities, this cooler ensures that your transmission operates smoothly and efficiently. Important Notes: Not for Direct Replacement: This cooler is an add-on, meaning it is not designed to replace the original equipment (OE) cooler directly. It should be used in conjunction with the existing cooling system. In essence, if you’re looking to add an extra layer of protection to your vehicle’s transmission, the Hayden Automotive 678 is a reliable choice that promotes longevity and performance. What are the applications of High Performance Graphite? Applications of High Performance Graphite High performance graphite is a versatile material that finds uses in a wide range of industries due to its exceptional properties such as high thermal conductivity, low thermal expansion, and excellent chemical resistance. Here are some key applications: Aerospace and Defense Heat Shields: Utilized in rockets and spacecraft to protect from extreme temperatures during re-entry. Composite Materials: Integrated into aircraft components for enhanced strength and reduced weight. Electronics Semiconductors: Essential in the production of semiconductors, providing a stable substrate. Heat Spreaders: Used in devices like smartphones and computers to dissipate heat efficiently. Automotive Brake Pads: Commonly used in high-performance brake systems due to its high friction and resistance to heat. Battery Electrodes: Key material in the manufacturing of lithium-ion batteries for electric vehicles. Energy Sector Nuclear Reactors: Provides excellent heat resistance and stability, making it useful for reactor components. Solar Panels: Used in the manufacturing of photovoltaic cells to improve efficiency. Industrial Applications Mold Release Agents: Facilitates the release of molded parts in high-temperature environments. Lubricants: Serves as a dry lubricant in situations where wet lubricants fail. Foundries and Metal Production Casting Molds: Employed in producing molds for metal casting due to its thermal conductivity and stability. Crucibles: Used in smelting and metal purification processes. Chemical Industry Gaskets and Seals: Suitable for harsh chemical environments due to its excellent chemical resistance. Catalytic Converters: Helps in facilitating catalytic reactions at high temperatures. Medical Implants: Sometimes used in medical implants and prosthetics due to its biocompatibility. Radiation Therapy: Utilized in components for medical radiation equipment. High performance graphite is indispensable in both high-tech and traditional industries. Its unique characteristics make it suitable for applications where other materials simply cannot perform. What is the LY2N-D2 Power Relay used for? The LY2N-D2 Power Relay is a versatile component designed to manage high-power electrical loads with precision. This relay operates at 12V DC and can handle up to 10 amps of current, making it suitable for various applications. Common Uses: Automotive Systems: Ideal for controlling headlights, horns, and other vehicle accessories. Industrial Equipment: Frequently used to operate machinery, motor controls, and HVAC systems. Home Automation: Can switch on/off high-powered devices like heating systems, air conditioners, and large appliances. DIY Projects: A favorite among hobbyists for building custom electronics that require reliable switching. Key Features: Double Pole Double Throw (DPDT): Allows for multiple configurations and better control over circuits. Compact Dimensions: Measuring 28 x 21.5 x 42.4 mm, it can easily fit into tight spaces. In essence, the LY2N-D2 Power Relay provides a reliable and efficient solution for switching high-current loads in a variety of settings. What are the specifications of the Gratux Diode 1N4007? Specifications of the 1N4007 Rectifier Diode Looking for comprehensive details on the 1N4007 rectifier diode? Below are its key specifications to help you understand its capabilities and applications: Type and Package: Diode Type: Standard Rectifier Package Type: DO-41 Axial Electrical Characteristics: Maximum Repetitive Peak Reverse Voltage (VRRM): 1000V Forward Continuous Current (IF): 1A Non-Repetitive Surge Peak Forward Current (IFSM): 30A (8.3ms single half-sine-wave) Thermal Characteristics: Operating Temperature Range: -65°C to +150°C Maximum Forward Voltage (VF): 1.1V at 1A Reverse Recovery Time (trr): 2 μs General Attributes: Guard Junction: Ensures stable performance Quantity in Pack: 20 units Why Choose the 1N4007? High Voltage Handling: Ideal for circuits that require high voltage rectification. Surge Protection: With its robust surge current capabilities, it can endure momentary overloads. Durability: Designed to operate under a wide range of temperatures, making it versatile for various environments. The 1N4007 is perfect for applications in power supplies, inverters, and other electronic circuits requiring dependable rectification. For consistent results and dependable performance, this diode offers a balanced mix of high voltage handling, current capacity, and durability. If you’re designing or repairing electronic circuits, it’s a reliable choice to keep in your toolkit. What vehicles are the OEM Genuine Push Rivet Plastic Fasteners compatible with? Compatibility of OEM Genuine Push Rivet Plastic Fasteners Wondering which vehicles these high-quality push rivet plastic fasteners fit? Here’s a quick guide: Compatible Vehicles Corolla Tacoma Rav4 These fasteners, certified to be genuine, are designed specifically for the above models, ensuring a perfect fit and reliable performance. Key Features Made in Japan: Ensuring top-notch quality and durability. Quantity: Available in a convenient pack of 10. Ideal for both DIY enthusiasts and professional mechanics, these fasteners provide a secure and reliable solution for your vehicle’s needs. What is included in the Case Club Ammo Can Lock Hardware Kit? What’s Included in the Ammo Can Lock Hardware Kit? When you purchase the Ammo Can Lock Hardware Kit, you’ll receive a comprehensive package designed to secure various sizes of ammunition cans. Here’s what’s inside: Durable Stainless Steel Hardware: Built to withstand the toughest conditions, this stainless steel hardware ensures long-lasting security. Waterproof Gasket: This is an essential component that helps keep your ammo dry, even in harsh environments. Versatile Compatibility: The kit fits multiple ammo can sizes, including: 50 Cal Fat 50 30 Cal 20mm 40mm Detailed Installation Instructions: Step-by-step guidance makes the installation process straightforward, even for beginners. This kit provides everything necessary to enhance the security and longevity of your ammo storage cans. What are the features of the Midland MXT275 MicroMobile GMRS Radio? Features of the Midland MXT275 MicroMobile GMRS Radio Compact and Powerful Communication 15-Watt Transmitting Power: Delivers a strong signal, ensuring clear communication over long distances. Integrated Control Microphone: Streamlines operation by incorporating essential controls directly into the microphone, enabling easy access while on the go. Customizable for Various Uses Overland, Caravanning, and Tractors: Designed to suit a variety of outdoor and vehicle-based activities, making it versatile for both professional and recreational use. Enhanced Connectivity and Range Detachable External Magnetic Mount Antenna: Comes with a high-quality antenna that enhances reception and can be easily attached or removed, depending on your needs. 8 Repeater Channels: Expands your communication range, allowing you to connect over longer distances via repeaters. User-Friendly Design Compact Size: Fits effortlessly into vehicles without taking up excessive space, making it ideal for mounting in tighter spots. Durable Construction: Built to withstand rugged conditions, ensuring reliable performance even in demanding environments. This radio offers a blend of power, convenience, and flexibility—perfect for those who need dependable communication on the go. What are the features of the Honda Portable Inverter Generator? Features of the Portable Inverter Generator Looking for a portable inverter generator for your power needs? This model offers several standout features: Power Output: Delivers a robust 2200 watts, making it ideal for various applications from home backup to camping. Voltage: Provides a steady 120 volts to ensure your delicate electronics stay safe during use. Quiet Operation: Designed to operate quietly, perfect for noise-sensitive environments or settings like campsites and residential areas. Portability: Its compact and lightweight design makes it easy to transport and maneuver, ensuring you can take it wherever you need power. Safety Features: Incorporates advanced CO-minder technology to monitor carbon monoxide levels, automatically shutting down the generator if they become dangerously high. 49-State Compliance: Meets the emissions standards for 49 states, ensuring it is environmentally friendly and compliant with regulatory requirements. These features make this inverter generator a versatile and reliable choice for various power needs, combining efficiency, safety, and portability in one package. What are the specifications of the Evolution Power Tools Chop Saw? Specifications of the 14″ Chop Saw Motor and Power: Power: 15-Amp motor ensures robust performance. Voltage: Compatible with standard electrical outlets. Blade and Cutting Capacity: Blade Size: 14-inch blade with 66 teeth. Blade Type: Tungsten Carbide Tipped (TCT) blade designed for cutting mild steel. Cutting Range: Adjustable miter range from 0 to 45 degrees. Design and Build: Cut-off Features: Precision-engineered for clean, consistent cuts on various metal types. Construction: Durable and built to withstand heavy-duty usage. Versatility and Usability: Adjustable Miter: Easily adjustable miter settings for angled cuts. Safety Features: Includes safety mechanisms to protect the user during operation. Additional Specifications: Weight: Lightweight and portable for job site convenience. Dimensions: Compact design, ideal for storage and transport. Whether you’re working on construction projects or DIY tasks, this chop saw delivers exceptional, reliable performance. How does the Loraffe Rodent Car Repeller work? The Loraffe Rodent Car Repeller provides a comprehensive solution to protect your vehicle from unwanted pests. Using advanced ultrasonic technology combined with strobe lights, this device effectively deters rodents like rats and mice from nesting in your car’s engine bay. Ultrasonic Sound High-Frequency Noise: The device emits high-frequency sound waves that are highly unpleasant to rodents but inaudible to humans. Varying Frequencies: It changes frequencies periodically to prevent rodents from getting used to the noise. Strobe Lights Bright Flashes: The repeller features powerful strobe lights that flash intermittently, startling and further deterring rodents from approaching. Dual Deterrent: The combination of sound and light creates an environment that is extremely uncomfortable for pests, discouraging them from entering. Battery Powered Power Independence: Operating on battery power, it remains functional even when the car is turned off, ensuring continuous protection. Long-Lasting: The batteries provide extended use, making maintenance minimal and convenient. Easy Installation Under Hood Placement: Designed to be installed under the hood, it seamlessly integrates into your vehicle’s engine area. Simple Setup: With clear instructions, it’s easy to install without professional assistance. By leveraging these effective deterrence methods, this repeller offers a reliable and humane way to protect your vehicle from rodent damage, giving you peace of mind and saving you from expensive repairs. What is the FK Bearings Spherical Bearing used for? Understanding the Use of Spherical Bearings What are Spherical Bearings? Spherical bearings, such as the WSSX16T with Teflon lining and a 1-inch diameter, are highly versatile components often found in various mechanical applications. Key Features Enhanced Rotation: The spherical design allows for smooth rotation along multiple axes. Durability: The Teflon lining reduces friction, increasing longevity and performance. Size Specifics: With a 1-inch diameter and 1-3/8 inch width, this bearing fits a range of mechanical needs. Applications Automotive Suspension Systems: Alignment Flexibility: Ideal for ensuring precise wheel alignment and handling. Dampening Vibrations: Helps in reducing noise and absorbing shocks from uneven terrains. Industrial Machinery: Rotational Capacity: Suitable for machines requiring rotational movement under heavy loads. Resistance to Wear: The Teflon lining minimizes wear and tear from constant use. Aerospace Components: Weight Efficiency: Lightweight and robust, perfect for high-stress aerospace environments. Precision Movements: Essential for parts that require exact, flexible positioning. Recreational Vehicles: Performance Reliability: Used in ATVs and off-road vehicles to withstand rough conditions. Customization Flexibility: Often incorporated into customized suspension systems for enhanced performance. Summary Spherical bearings, especially those designed with Teflon, are indispensable in fields requiring rotational flexibility, durability, and precise alignment. From automotive suspension systems to aerospace components, their wide range of applications makes them a valuable asset in both industrial and recreational settings. What is the CANOPUS Sound Deadening Mat used for? The CANOPUS Sound Deadening Mat is designed to significantly reduce noise and vibrations in your vehicle, providing a quieter and more comfortable driving experience. Key Uses: Car Trunk: It effectively dampens the noise emanating from the rear of the vehicle, making for a more peaceful ride. Doors: Installed in car doors, it helps to minimize outside road noise and enhances the sound quality of your car’s audio system. Floor: Placing the mat on the floor reduces the impact of road and tire noise, giving a more silent cabin environment. Ceiling: By dampening vibrations from the roof, it further contributes to an overall quieter atmosphere inside the car. Features and Benefits: Material: Crafted from high-quality butyl, it provides excellent sound insulation and durability. Easy Installation: Comes in a pack of 18 sheets, offering coverage for multiple areas throughout your vehicle. Versatility and Efficiency This sound deadening mat is not only limited to cars. It can also be used in other vehicles like trucks and SUVs for the same noise reduction benefits. In summary, the CANOPUS Sound Deadening Mat is a versatile and effective solution for anyone looking to enhance their vehicle’s acoustics and enjoy a quieter ride. How is the Mityvac Fluid Evacuator Extractor used? How to Use the Mityvac Fluid Evacuator Extractor The Mityvac Fluid Evacuator Extractor is a versatile tool designed to assist with various automotive tasks, including handling fluids in master cylinders, transaxles, power steering systems, and coolant reservoirs. Here’s a step-by-step guide to using this practical device effectively. Step 1: Prepare the Extractor Attach the tube: Begin by connecting the 7-1/2″ flexible tube to the syringe. Ensure it’s securely fastened to avoid leaks. Non-drip cap: Place the non-drip cap on the fluid receptacle to prevent spills during the process. Step 2: Position the Extractor Locate the fluid reservoir: Identify the fluid reservoir you need to extract from or dispense into, such as the master cylinder or power steering system. Insert the tube: Carefully insert the flexible tube into the reservoir. Make sure it reaches the fluid without causing any damage to the surrounding components. Step 3: Extract the Fluid Create suction: Slowly pull the syringe handle to create suction, drawing fluid into the tube and syringe. Monitor the level: Keep an eye on the fluid level inside the syringe to avoid overfilling. The extractor has a 7oz capacity. Step 4: Dispense the Fluid Position the syringe: If you need to dispense fluid, position the syringe above the appropriate reservoir. Release the fluid: Gently press the syringe handle to release the fluid into the system. Ensure that you dispense the fluid gradually to prevent overflow or spills. Step 5: Clean and Store Clean the syringe: After use, detach the tube and clean the syringe thoroughly to ensure it’s ready for the next job. Storage: Store the tube, non-drip cap, and syringe in a safe, dry place to maintain its longevity. Key Features for Ease of Use Lightweight and Ergonomic: The extractor is designed to be lightweight for easy handling, reducing strain during use. Easy-to-Clean Components: All parts of the extractor can be quickly disassembled and cleaned, ensuring no residue is left behind. Flexible Tube: The 7-1/2″ flexible tube reaches tight and hard-to-access areas without hassle. By following these steps, you can efficiently use the Mityvac Fluid Evacuator Extractor for various automotive maintenance tasks, ensuring clean and precise fluid handling every time. What is the Nilight Car Add-a-circuit Fuse TAP Adapter used for? What is the 12V Car Add-a-Circuit Fuse TAP Adapter Used For? The 12V Car Add-a-Circuit Fuse TAP Adapter is an essential tool for anyone looking to safely and efficiently add electrical accessories to their vehicle. Here’s what it does: Expand Existing Circuits: This adapter allows you to add new circuits without splicing into your vehicle’s existing wiring. This is especially useful for adding aftermarket accessories such as dash cams, GPS units, or additional lighting. Simple Installation: It fits into your existing fuse box, replacing a standard fuse. The adapter has an extra slot for a new fuse, ensuring the added accessory gets its own dedicated circuit. Safety and Protection: Each adapter comes with a low-profile mini blade fuse set, usually rated around 5 Amps. This provides overcurrent protection for your additional device, safeguarding both your new accessory and your vehicle’s electrical system. Versatile Applications: Whether for cars, trucks, or boats, this adapter is versatile and can be used across various types of vehicles, making it a handy tool for different on-the-go electrical needs. Color-Coded for Convenience: Different colors like blue, red, black, and orange help you keep track of which adapter goes where, ensuring a straightforward setup and future troubleshooting. Why You Need It Adding new electronics to your vehicle traditionally requires complex wiring work. This adapter simplifies the process and helps you avoid potential mistakes that could lead to electrical issues. If you’re looking to enhance your vehicle with new tech gadgets, this tool provides a safe and straightforward solution. What are the specifications of the Rockford Fosgate P3SD2-8 Car Subwoofer? Rockford Fosgate P3SD2-8 Car Subwoofer Specifications Looking for a powerful subwoofer that fits in tight spaces? The 8-inch dual 2-ohm Punch Series shallow mount might be just what you need. Here’s a detailed look at its specifications: Size and Fitment: Speaker Size: 8 inches Mounting Depth: Ideal for shallow mount applications Power Handling: RMS Power Handling: 150 watts Peak Power Handling: 300 watts Impedance: Voice Coils: Dual 2-ohm Performance: Frequency Response: 38Hz – 250Hz Sensitivity: 83 dB Construction: Cone Material: Anodized aluminum cone Surround Material: Santoprene rubber surround Design Features: VAST Technology: Increases surface cone area for better performance FlexFit Basket: Allows slight adjustments, ensuring an optimal fit Dimensions: Overall Diameter: Approximately 8.87 inches (22.6 cm) Mounting Depth: Roughly 2.66 inches (6.76 cm) This subwoofer offers a blend of compact design and robust performance, crafted to meet the demands of car audio enthusiasts. Whether you’re upgrading your existing system or setting up a new one, its shallow mount design ensures easy installation without sacrificing sound quality. What are the features of the Mobil 1 75W-90 Synthetic Gear Lube? Key Features of the 75W-90 Synthetic Gear Lube 1. Superior Protection The 75W-90 Synthetic Gear Lube offers exceptional wear protection. It reduces metal-to-metal contact, thus enhancing the longevity of gears and bearings. This is particularly beneficial in high-load situations where traditional oils might fail. 2. Thermal Stability This gear lube maintains its performance even under extreme temperatures. Its thermal stability ensures that it remains effective from cold start-ups to hot operating conditions, reducing the need for frequent oil changes. 3. Enhanced Fuel Efficiency By reducing friction in the drivetrain, the 75W-90 Synthetic Gear Lube contributes to better fuel economy. Lower friction means your engine doesn’t have to work as hard, which can translate to savings at the pump. 4. Excellent Rust and Corrosion Protection Formulated to fight rust and corrosion, this lubricant safeguards critical parts from moisture and contaminants. This feature is especially important for vehicles used in harsh or humid environments. 5. Smooth Operation The lube ensures smoother gear transitions, reducing noise and vibrations. This results in a quieter, more comfortable driving experience, regardless of the vehicle’s speed or load. 6. Multi-Vehicle Capability This gear lube is versatile enough to be used in a range of vehicles, from trucks and SUVs to high-performance cars. Its broad compatibility makes it a valuable addition to any garage. By integrating these features, the 75W-90 Synthetic Gear Lube provides reliable, high-performance lubrication that meets the demands of modern vehicles. What is the towing capacity of a Tacoma? When considering a Tacoma for towing purposes, it’s essential to know its capacity to ensure it meets your needs. This versatile truck has been a favorite for years, and its towing capabilities are one of the reasons why. Towing Capacity Overview 2005-2015 Models For Tacomas produced between 2005 and 2015, the towing capacity varies significantly depending on the engine and configuration. Here’s a breakdown: Four-Cylinder Engine: Typically, the four-cylinder models have a towing capacity of up to 3,500 pounds. This is suitable for smaller trailers and lightweight equipment. V6 Engine: The V6 variants offer more power, with towing capacities ranging from 6,400 to 6,500 pounds. These models are ideal for medium-sized trailers, boats, and other heavier loads. Factors Affecting Towing Capacity Several factors can influence the actual towing capacity of your Tacoma: Engine Type: As noted, the engine size plays a crucial role. The V6 provides more power and, consequently, a higher towing limit. Drivetrain Configuration: Whether your Tacoma is a 4×2 or 4×4 model can also impact towing potential. Generally, 4×2 models might tow slightly more due to their lighter weight. Towing Package: Some Tacomas come equipped with a towing package, which includes features like additional cooling systems and upgraded rear springs. This package can enhance your truck’s towing capacity. Additional Equipment: Weight distribution hitches, sway control devices, and brake controllers can also improve towing performance and safety. Real-World Application Owners and enthusiasts find that Tacomas with the V6 engine and proper towing equipment perform admirably for most recreational towing needs, from camping trailers to small boats. Always ensure you check the owner’s manual and consult with experts when setting up your vehicle for towing to customize it effectively for your specific requirements. In summary, the Tacoma’s towing capacity is versatile, making it a reliable choice for many towing tasks. Understanding these capacities helps you make an informed decision and get the most out of your vehicle. What are some cheap Tacoma modifications? Affordable Tacoma Modifications Owning a Tacoma doesn’t mean you have to break the bank on modifications. Here are some budget-friendly options that can enhance both the performance and aesthetics of your truck: Tire Upgrades Optimize your ride with larger tire sizes while maintaining stock suspension. It’s a cost-effective mod that offers both improved traction and a more aggressive look. Anti-Theft Measures Protect your tailgate from theft with simple security devices. Many affordable tools can ensure your tailgate stays right where it belongs. Improve Fuel Efficiency Streamline your Tacoma’s aerodynamics or invest in a performance air filter. Such modifications can lead to noticeable improvements in gas mileage. Routine Maintenance Mods Change your own oil with a DIY oil change kit, and make sure to familiarize yourself with the oil filter location and the different types available. Swap out spark plugs regularly to keep your engine running smoothly. This is an easy and inexpensive way to maintain performance. Detailing and Cleaning Invest in quality washing and detailing products. Keeping your Tacoma clean not only keeps it looking good but can also extend the life of its exterior components. Customized Lighting Install after-market lights to enhance visibility and customize the look of your Tacoma. Wiring these lights yourself can save you from additional labor costs. Audio System Enhancements Upgrade your stereo and speakers for a richer audio experience without spending a fortune. There are many affordable options that can drastically improve sound quality. Efficient Towing Setup Outfit your Tacoma for towing with budget-friendly hitches and towing guides. This is particularly useful if you plan to tow trailers or other heavy loads. Manage Tire Pressure Regularly check and adjust tire PSI to ensure optimal performance and safety. Stable tire pressure can also enhance fuel efficiency. Air Filter Modifications Remove the secondary air filter for a slight improvement in airflow and engine performance. It’s a simple, cost-free adjustment that many Tacoma owners swear by. Technical Gadgets Utilize a tire size calculator to visualize and plan out your tire upgrades. This ensures you pick the right size without costly trial and error. Check engine light OBD-2 codes yourself with a diagnostic tool. This can demystify engine issues and help you address them without a pricey mechanic visit. These modifications are not only easy on the wallet but also relatively simple to perform. Each small enhancement can significantly improve the functionality and enjoyment of your Tacoma. How can you improve gas mileage on a Tacoma? How to Improve Gas Mileage on Your Tacoma Improving gas mileage can not only save you money but also extend the life of your Tacoma. Here are some practical tips to boost your vehicle’s fuel efficiency: 1. Maintain Proper Tire Pressure Under-inflated tires can create extra resistance, decreasing fuel efficiency. Regularly check and maintain your tire pressure at the recommended levels. Use a reliable tire gauge, and don’t forget to check your tires when they are cold. 2. Regular Maintenance Keeping up with routine maintenance is crucial. This includes: Oil Changes: Use the recommended grade of motor oil and change it regularly. Filter Replacements: Change air filters at specified intervals to ensure your engine breathes well. Spark Plugs: Replace worn-out spark plugs, as they directly impact engine performance. 3. Smooth Driving Habits Adopt fuel-efficient driving habits such as: Gentle Acceleration and Braking: Avoid sudden stops and starts. Cruise Control: Use this feature on highways to maintain a constant speed. Avoid Idling: Shut off the engine during long stops. 4. Reduce Extra Weight Remove unnecessary items from your Tacoma. Excess weight, especially in the trunk or cargo area, can decrease your vehicle’s fuel efficiency. Consider removing roof racks or carriers when not in use. 5. Upgrade to Eco-Friendly Tires Switch to low rolling resistance tires that are designed to enhance fuel efficiency. These tires can reduce the energy loss as your Tacoma rolls. 6. Use the Right Fuel Always use the grade of gasoline recommended by the manufacturer. Higher octane fuel doesn’t necessarily mean better performance for all vehicles. 7. Aerodynamic Adjustments Consider the following to reduce aerodynamic drag: Close Windows: At high speeds, open windows can increase drag. Remove Excess Accessories: Unnecessary external accessories, such as roof racks, can add to the aerodynamic drag. Implementing these strategies can significantly improve the fuel mileage of your Tacoma, making your driving experience more economical and environmentally friendly. How do you change spark plugs on a Tacoma? How to Change Spark Plugs on a Tacoma Changing the spark plugs on your Tacoma is an essential part of vehicle maintenance that helps improve performance and fuel efficiency. Follow these steps to change the spark plugs efficiently: Tools and Materials You’ll Need: A set of new spark plugs (check your owner’s manual for the correct type and gap) Ratchet and socket set Spark plug socket Torque wrench Anti-seize lubricant (optional but recommended) Dielectric grease Extension bar (for reaching deep spark plugs) Compressed air (for cleaning the area) Step-by-Step Instructions: Prepare Your Vehicle Ensure the engine is off and cool before starting. Open the hood and disconnect the negative terminal from the battery to prevent any electrical mishaps. Locate the Spark Plugs On most Tacomas, the spark plugs are under the engine cover. Remove the cover by unscrewing the bolts holding it in place. Remove the Ignition Coils or Plug Wires If your Tacoma uses coil-on-plug ignition, unplug the electrical connectors and remove the bolts holding the ignition coils. For older models with distributor-type ignition, carefully pull the plug wires off the spark plugs. Clean the Area Use compressed air to blow away any dirt or debris around the spark plug wells. This step prevents contaminants from entering the combustion chamber when you remove the spark plugs. Remove the Old Spark Plugs Use a spark plug socket attached to an extension bar and ratchet to gently loosen and remove each spark plug. Turn them counterclockwise until they come out. Check and Gap the New Spark Plugs Verify that the new spark plugs are gapped correctly according to your vehicle’s specifications. Gapping tools can help you adjust the gap if needed. Install the New Spark Plugs Apply a small amount of anti-seize lubricant to the threads of each new spark plug. Carefully thread them into the spark plug wells by hand to avoid cross-threading. Use a torque wrench to tighten them to the manufacturer’s recommended torque specification. Reattach the Ignition Coils or Plug Wires For coil-on-plug systems, place the ignition coils back over the spark plugs, secure them with bolts, and reconnect the electrical connectors. If your Tacoma uses spark plug wires, push them back onto the new spark plugs until they click into place. Reconnect the Battery and Test Reconnect the negative battery terminal. Start the engine to ensure it runs smoothly and check for any dashboard warning lights. Reinstall the Engine Cover Place the engine cover back and secure it with the bolts you removed earlier. Final Tips Regular Maintenance: Check your spark plugs every 30,000 miles or as recommended by your vehicle’s manual. Be Gentle: Take care not to over-tighten the spark plugs to prevent damage to the threads. Use Quality Parts: Opt for high-quality spark plugs from reputable brands to ensure longevity and performance. By following these steps, you’ll ensure that your Tacoma runs efficiently and smoothly. Regularly changing your spark plugs is a simple yet crucial part of maintaining your vehicle’s health. How do you perform a DIY oil change on a Tacoma? How to Perform a DIY Oil Change on a Tacoma Changing the oil in your Tacoma can be a simple and rewarding task. Below is a step-by-step guide to help you tackle this job with confidence and ensure your truck’s engine runs smoothly. Tools and Materials You’ll Need Oil filter wrench Socket set and ratchet Drain pan Funnel Gloves Jack and jack stands Replacement oil filter (Consult your owner’s manual for specifications) New oil (Check the recommended type and amount in your owner’s manual) Clean rags or paper towels Step-by-Step Guide Prepare Your Vehicle Safety First: Park your Tacoma on a flat, stable surface. Engage the parking brake. Lift the Vehicle: Use a jack to lift the front of your Tacoma and secure it with jack stands to ensure stability. Warm Up the Engine: Run the engine for a few minutes to warm up the oil. Warm oil drains more easily than cold. Drain the Old Oil Locate the Oil Pan: Crawl under the vehicle and locate the oil pan. It’s usually near the engine’s bottom. Position the Drain Pan: Place your drain pan under the oil pan drain plug to catch the old oil. Remove the Drain Plug: Use a socket wrench to remove the drain plug. Allow the oil to drain completely, which may take several minutes. Replace the Oil Filter Locate the Oil Filter: It’s typically near the oil pan but consult your manual if you’re unsure. Remove the Old Filter: Use an oil filter wrench to remove the old filter. Be prepared for some oil to spill out. Install the New Filter: Before installing the new filter, lightly coat its rubber gasket with new oil. This helps create a good seal. Screw the new filter on by hand, but don’t overtighten. Add New Oil Replace the Drain Plug: Once the old oil has drained completely, reinstall the drain plug and tighten it. Add New Oil: Open the hood and locate the oil filler cap. Remove the cap and insert a funnel. Pour in the amount of oil specified in your owner’s manual. Check the Oil Level: Use the dipstick to ensure the oil level is correct. Add more oil if needed but don’t overfill. Final Steps Run the Engine: Start the engine and let it run for a few minutes. Check for leaks around the oil filter and drain plug. Recheck the Oil Level: Turn off the engine, wait a few minutes, and then recheck the oil level, adding more if necessary. Dispose of Old Oil: Take your used oil and filter to a recycling center or auto parts store that accepts used oil. Clean Up Clean Your Work Area: Wipe down any spills and properly store your tools. Record the Oil Change: Note the date and mileage of your oil change for future reference. Tips for a Successful Oil Change Wear gloves to keep your hands clean and protected from hot oil. Double-check your owner’s manual for the correct type and amount of oil. Inspect other under-hood components while doing your oil change to catch any maintenance issues early. By following these steps, you’ll not only save money on mechanic fees but also gain satisfaction from taking care of your Tacoma personally. Happy wrenching! How do you install speakers in a Tacoma? How to Install Speakers in a Tacoma Upgrading the speakers in your Toyota Tacoma can greatly enhance your driving experience with improved sound quality. Follow this straightforward guide to install new speakers in your Tacoma. Tools and Materials You’ll Need: New speakers (ensure they’re compatible with your Tacoma) Screwdrivers (Phillips and flathead) Panel removal tool Wire cutters/strippers Electrical tape or connectors Drill and bits (if required for mounting) Step-by-Step Guide Preparation Safety First: Disconnect the negative terminal of your battery to prevent any electrical issues. Gather Tools: Ensure you have all necessary tools and materials within reach. Remove Door Panels Locate Screws: Most door panels are secured with a combination of screws and clips. Use a Phillips screwdriver to remove visible screws around the door handle, armrest, and edges. Use Panel Tool: Insert the panel removal tool between the door and the panel. Carefully pry it open, working your way around to release all the clips. Detachment: Lift the door panel upwards to disconnect it from the window channel, then set it aside. Remove Old Speakers Detach Old Speakers: Unscrew the old speakers from the mounting bracket. You may need a drill or screwdriver, depending on the type of screws used. Disconnect Wiring: Carefully disconnect the wiring harness from the back of the old speakers. Note the positive and negative terminals for reconnection. Install New Speakers Connect Wiring: Attach the wiring harness to the new speakers. Ensure that positive and negative terminals are correctly matched to avoid sound distortion. Mount Speakers: Secure the new speakers into the existing mounting holes using screws. You may need to drill new holes or use adapters if the new speakers don’t match the mounting pattern of the old ones. Test the Speakers Reconnect Battery: Reconnect the negative terminal of your battery. Audio Test: Turn on your car stereo to test the new speakers. Ensure they are working correctly before reassembling the door panel. Reassemble Door Panels Reposition Panel: Place the door panel back onto the door, aligning it with the window channel. Secure Clips and Screws: Push the panel firmly to snap all clips into place, then reinsert and tighten all screws. Final Checks Sound Quality Test: Play various types of music to ensure the sound is clear and the speakers are operating without issues. Tidy Up: Ensure no wires are exposed and everything is securely in place. Tips for a Successful Installation Consult Manuals: Refer to your vehicle’s manual for specific instructions or diagrams related to speaker removal and installation. Use Quality Connectors: Ensure all electrical connections are secure and insulated to prevent short circuits or connection issues. Take Your Time: Rushing the process can lead to mistakes. Take your time to ensure every step is completed correctly. Upgrading your Tacoma’s speakers is a manageable DIY project that can make a significant difference in your audio experience. Follow these steps carefully for a successful installation. Enjoy your enhanced driving soundscape! How do you install a stereo in a Tacoma? How to Install a Stereo in a Tacoma Installing a stereo in your Toyota Tacoma can be a rewarding DIY project. With a few tools and some patience, you can upgrade your vehicle’s sound system. Here’s a step-by-step guide to help you through the installation. Tools and Materials Needed Screwdrivers (Phillips and flat-head) Panel removal tool Wiring harness adapter Antenna adapter Crimping tool or soldering iron Electrical tape Trim removal tool Stereo mounting kit Your new stereo unit Step-by-Step Installation Guide Disconnect the Battery Safety first: Disconnect the negative terminal of your vehicle’s battery to prevent any electrical shorts or shocks. Remove the Old Stereo Remove Trim Panels: Use a trim removal tool to carefully pry off the dash panels surrounding your stereo. Start at the corners and work gently to avoid breaking any clips. Unscrew the Stereo: Locate and remove the screws securing the old stereo unit. Keep these screws in a safe place as you may need them later. Disconnect Wiring: Carefully slide the stereo unit out and disconnect the wiring harness and antenna cable. Prepare the New Stereo Wire the Harness: Connect the wiring harness adapter to your new stereo’s harness. Match the color-coded wires and crimp or solder each connection securely. Wrap each connection in electrical tape for insulation. Antenna Adapter: Attach the antenna adapter to the new stereo’s antenna port. Install the New Stereo Mount the Stereo: Insert the new stereo into the dash kit according to the mounting kit’s instructions. Secure it in place using the screws you saved earlier. Connect Wiring: Attach the wiring harness adapter and antenna cable to the back of the new stereo. Testing Reconnect the Battery: Reattach the negative terminal of your battery. Test Functionality: Turn on the stereo and test all functions, including radio reception, Bluetooth connectivity, and all speakers. Reassemble the Dash Replace Trim Panels: Carefully snap the trim panels back into place around the stereo. By following these steps, you can successfully install a new stereo in your Tacoma. Enjoy your upgraded sound system! If you encounter any issues, it may be helpful to consult online forums or instructional videos for additional guidance. What are some common products discussed for 2nd Gen. Tacomas (2005-2015)? Common Products for 2nd Gen. Tacomas (2005-2015) When it comes to maintaining or upgrading your 2nd Gen. Tacoma, a range of products can be particularly useful. Here are some common items that owners often discuss and invest in: Maintenance and Performance Synthetic Gear Lubes Essential for keeping your truck running smoothly by reducing wear and tear on the gearbox. Transmission Coolers Helps in managing the temperature of your transmission, especially useful if you do a lot of towing or off-road driving. Mount Kits and Bearings Necessary for suspension enhancements and ensuring the stability of your vehicle. Brake Pads and Rotors High-quality brake components are crucial for safe and efficient stopping power. Tire Pressure Monitoring Sensors (TPMS) An essential component for maintaining optimal tire pressure and ensuring safety on the road. Audio and Electronics Car Subwoofers Audio upgrades for better sound quality during your drives. Two-Way Radios Useful for communication during off-road adventures or caravanning. OBD2 Scanners Handy for diagnosing any issues with your vehicle’s electronic systems. Tools and Accessories Circular Saws Might be needed for various DIY projects related to your vehicle or general purposes. Double-Sided Foam Adhesive Tapes Used for mounting various accessories securely. Fluid Pumps and Extractors Make it easier to transfer fluids like oil or transmission fluid without spills. Sound Deadening Mats Improve the acoustic environment inside your vehicle by reducing road noise. Rodent Repellents Keep critters away from making a home under your hood. Specialty Equipment Portable Air Compressors Critical for off-roaders who need to adjust tire pressures on the go. Ultra Sonic Animal Repellents Protect wiring and hoses from being chewed by rodents. Engine Oil Filters Ensure your engine’s longevity by trapping contaminants effectively. Coolant Filling Kits Prevent air pockets in your cooling system, aiding in engine temperature management. Customization and Utility Tailgate Locks Enhance security and prevent unauthorized access to your truck bed. Upper Control Arms Often upgraded for better handling and suspension articulation, ideal for serious off-roading. Magnefine Filters Add extra filtration for your transmission or power steering systems, extending their life. Fluid Extractors Simplify maintenance tasks by allowing easy removal of various fluids. Sound Deadening Materials Besides improving audio quality, these materials also provide thermal insulation. By investing in these products, you can enhance the performance, utility, and comfort of your 2nd Gen. Tacoma, making it better suited for both daily driving and adventurous off-road activities. What are some how-to guides for 2nd Gen (2005-2015) Tacomas? How-To Guides for 2nd Gen (2005-2015) Tacomas If you’re looking to get hands-on with your 2nd Gen Tacoma (2005-2015), here are some detailed how-to guides to help you out: DIY Oil Change Steps: Gather tools and materials: oil filter, new oil, wrench, funnel, and drain pan. Safely jack up the truck and locate the oil drain plug. Drain old oil, replace the oil filter, and refill with fresh oil. Changing Spark Plugs Steps: Remove the engine cover to access the spark plugs. Remove the ignition coils. Replace old spark plugs with new ones and reattach the ignition coils. Check Engine Light OBD-2 Codes Steps: Use an OBD-2 scanner to read error codes from the engine control unit. Identify and solve the issue based on the diagnostic codes. Clear the codes using the scanner once repairs are completed. Stereo and Speaker Installation Steps: Remove the existing stereo and speakers carefully to avoid damaging the wiring. Choose compatible aftermarket stereo and speakers. Install new stereo and speakers, ensuring all connections are secure. Tire Size Calculator and PSI Management Steps: Use an online tire size calculator to determine compatible tire sizes. Check and adjust tire pressure according to manufacturer recommendations for optimal performance and safety. Towing Guide Steps: Learn the towing capacity of your Tacoma model. Ensure your hitch and trailer are correctly installed and compatible. Follow safe towing practices, including weight distribution and load securing. Maintenance Required Light Reset Steps: Turn the ignition to the “ON” position without starting the engine. Press the trip meter button until the display resets, indicating the maintenance light has been cleared. Removing Secondary Air Filter Steps: Locate the secondary air filter housing. Remove any bolts or clips securing the housing. Take out the old filter and replace it with a new one. Wiring After-Market Lights Steps: Plan the wiring route and gather necessary supplies: wire harness, connectors, and switches. Follow the light manufacturer’s instructions to connect wires properly. Secure and test the wiring to ensure all lights function as intended. These guides cover essential maintenance and upgrading tasks, making them a valuable resource for any 2nd Gen Tacoma owner. How do you remove the secondary air filter on a Tacoma? How to Remove the Secondary Air Filter on a Tacoma Removing the secondary air filter on your Tacoma is a simple process that requires minimal tools. Follow these steps to ensure a smooth and efficient removal: Gather Your Tools Screwdriver (Phillips or flathead, depending on your vehicle model) Pliers (if needed) Locate the Air Filter Housing Open the hood of your Tacoma and find the primary air filter housing. Usually, the secondary air filter is situated nearby. Access the Secondary Air Filter Unclip or unscrew the housing cover. This will vary by model but typically involves either metal clips or screws. Lift the cover carefully to avoid dislodging any connected wires or hoses. Remove the Secondary Air Filter Identify the secondary air filter within the housing. It may be secured with additional clips or brackets. Unclip or unbolt any securing mechanisms using your screwdriver or pliers. Gently pull out the secondary air filter. Ensure you do so without causing any damage to the filter or the surrounding components. Inspect and Replace if Necessary Before discarding, check the filter for any signs of excessive dirt, damage, or wear. If the filter is still in good condition and just requires cleaning, use compressed air to blow out any debris. If not, replace it with a new secondary air filter compatible with your Tacoma model. Reassemble the Housing Once the secondary air filter has been cleaned or replaced, place it back into its original position. Secure the filter with the original clips or bolts. Reattach the cover of the air filter housing, ensuring all clips or screws are firmly in place. Final Checks Close the hood and start the engine to make sure everything is functioning properly. Tips for Maintaining Your Tacoma’s Air Filters Regular Inspections: Check your air filters every 6 months or according to your vehicle’s maintenance schedule. Quality Replacements: Use OEM (Original Equipment Manufacturer) parts or reputable third-party brands to ensure longevity and performance. Keep a Spare: Having an extra filter on hand can save time and hassle during future maintenance. By following these steps, you can efficiently remove and maintain the secondary air filter on your Tacoma, ensuring optimal engine performance and longevity. What are the best practices for washing and detailing a Tacoma? Best Practices for Washing and Detailing a Tacoma If you’re looking to keep your Toyota Tacoma looking its best, following a detailed washing and detailing routine is essential. Here’s a step-by-step guide to help you maintain that pristine finish: Preparation Gather Your Supplies Before you start, ensure you have all necessary tools and products: Car shampoo (specifically formulated for automotive paint) Microfiber wash mitts and towels Buckets (two-bucket method recommended) Grit guards Detailing brushes (for intricate areas) Wheel cleaner and brushes Clay bar or clay mitt Polish Wax or sealant Glass cleaner Tire and trim dressing Washing Rinse Thoroughly Begin by rinsing your Tacoma to remove loose dirt and debris. Use a hose or pressure washer to cover all surfaces, focusing on the wheel wells and undercarriage. Two-Bucket Method Fill one bucket with soapy water and another with clean water. Use the clean water to rinse your wash mitt after each pass. This prevents dirt from scratching the paint. Start from the Top Always wash from the top down. This ensures that dirty water flows downward and doesn’t re-soil cleaned areas. Clean Intricate Areas Use detailing brushes to clean tight areas like grilles, badges, and around the windshield wipers. Tackle the Wheels Use a dedicated wheel cleaner and separate brushes for your wheels and tires, as these areas are often the dirtiest. Decontamination Clay Bar Treatment After washing, use a clay bar or clay mitt to remove embedded contaminants from the paint. Lubricate the surface with a clay lubricant and gently glide the clay bar over the paint. This step ensures a smooth surface for polishing and waxing. Polishing Apply Polish If the paint has minor imperfections or swirls, apply a polish using a dual-action polisher or by hand. This step enhances the paint’s clarity and restores its shine. Protection Wax or Sealant Choose between a wax for a warm, deep shine or a sealant for longer-lasting protection. Apply the product using a foam applicator pad in small, overlapping circles. Let it haze, then buff it off with a clean microfiber towel. Detailing Glass Cleaning Use a dedicated glass cleaner to clean windows and mirrors. A quality microfiber glass towel will ensure a streak-free finish. Tire and Trim Dressing Apply a tire dressing to restore the sheen to your tires. Use trim dressing to rejuvenate any faded plastic or rubber trim. Interior Detailing For a complete detail, don’t neglect the interior. Vacuum thoroughly, clean all surfaces with appropriate cleaners, and condition any leather or vinyl. Finishing Touches Final Inspection After completing the exterior and interior, do a final walk-around. Ensure there are no missed spots and all areas are buffed to perfection. Tips for Maintenance Regular Washing: To maintain your Tacoma’s finish, wash it regularly, especially after exposure to harsh conditions like salt and road grime. Use Quality Products: Investing in high-quality soaps, polishes, and waxes can make a significant difference. Stay Hydrated: Detailing a vehicle can be hard work. Take breaks and stay hydrated. By following these best practices, your Toyota Tacoma will not only look great but also retain its value and longevity. Happy detailing! What is included in the Power Stop Brake Pads and Rotors Brake Kit? When you purchase this comprehensive brake kit, you’ll receive everything needed for a complete brake overhaul specifically designed for your vehicle. Here’s a detailed breakdown of what’s included: Brake Pads Type: Carbon-Fiber Ceramic Quantity: Front brake pads set Performance: Designed to reduce dust and noise while providing superior stopping power Rotors Type: Drilled and Slotted Size: 12.56 inches for optimal heat dissipation Quantity: Two front rotors Benefits: Enhanced braking performance, especially during high-stress conditions Compatibility Vehicles: 2007-2014 Toyota FJ Cruiser 2005-2022 Toyota Tacoma (6 lug) 2003-2009 Toyota 4Runner Additional Hardware Items Included: Installation hardware such as shims and chamfered slots for a quieter brake operation and easier setup By including these high-quality components, this brake kit ensures that you get a significant upgrade over stock braking systems, boosting your vehicle’s performance and safety. What are the specifications of the Freedom OffRoad Front Upper Control Arms? Specifications of the Freedom OffRoad Front Upper Control Arms Key Features: Vehicle Compatibility: Designed for 2005 through 2023 Toyota Tacoma models. Construction: Made from high-strength steel for enhanced durability. Finish: Coated with a corrosion-resistant powder to withstand harsh environments. Bushings: Equipped with polyurethane bushings that offer a balance of flexibility and firmness. Detailed Specifications: Material: High-grade steel for structural integrity. Powder-coat finish to resist rust and corrosion. Bushings: Performance-oriented polyurethane bushings. Improved responsiveness and longevity compared to rubber bushings. Flexibility: Provides better articulation and flexibility for off-road conditions. Enhanced suspension travel for improved handling. Installation: Direct Fit: Designed for a straightforward bolt-on installation without the need for extra modifications. Instruction Manual: Comes with detailed installation instructions to assist both novice and experienced mechanics. Performance Benefits: Increased Control: Enhanced handling and steering response. Durability: Withstands the rigors of off-road driving, extending the lifespan of the suspension system. Better Alignment: Helps maintain proper wheel alignment, reducing tire wear. Additional Notes: Warranty: Often includes a manufacturer’s warranty, providing peace of mind against defects and workmanship issues. Customer Support: Access to dedicated technical support for any installation or performance questions. These control arms are specifically engineered to improve the overall driving experience for 2005 to 2023 ToyotaTacoma owners, combining performance with robust construction for all types of terrain. What are the specifications of the Toyota Genuine Parts Fr Brake Pad? Specifications of the Front Brake Pad When it comes to ensuring your vehicle’s optimal performance, having the right brake pads is crucial. Here are the detailed specifications for our Front Brake Pad (Part No. 04465-AZ100): Key Features Material: High-quality ceramic composition for superior braking performance and reduced wear. Compatibility: Customized to fit a range of specific vehicle models. Ensure compatibility by checking your vehicle’s user manual or consult with a professional mechanic. Design: Engineered to meet rigorous standards, providing a perfect fit and easy installation. Performance Noise Reduction: Built with a noise-dampening layer to ensure a quiet ride. Heat Dissipation: Designed to handle high temperatures, reducing the risk of brake fade. Durability: Offers long-lasting wear resistance to maintain safety and performance over thousands of miles. Additional Specifications Dimensions: Precisely cut to match factory specifications (Please refer to manufacturer documentation for exact measurements). Weight: Lightweight design optimized for performance without compromising durability. Safety Compliance: Meets or exceeds all OEM safety standards and regulations. Pricing Cost: $59.25 per set, providing an excellent balance of quality and affordability. Why Choose This Brake Pad? Enhanced Safety: Superior stopping power to ensure you and your passengers are safe. Long-term Savings: The durable construction means fewer replacements and maintenance costs. Performance: Best-in-class materials provide exceptional braking performance. Make an informed choice by opting for this high-quality front brake pad, guaranteeing you top-notch performance and safety. What are the features of the VIAIR Tire Inflator Portable Air Compressor? Features of the VIAIR Tire Inflator Portable Air Compressor The VIAIR Tire Inflator Portable Air Compressor is a versatile and robust device designed for both on-road and off-road use. Key Features: Portable and Durable: Compact design ensures easy portability, while its robust construction guarantees durability across various terrains. High Pressure Capacity: Capable of delivering up to 120 PSI, making it suitable for inflating tires of cars, trucks, SUVs, and RVs. 12V Power Supply: Operates on a 12-volt power source, allowing you to plug it into your vehicle’s cigarette lighter or directly to the battery using the alligator clips. User-Friendly Interface: Equipped with an easy-to-read pressure gauge and a twist chuck for a secure connection to the tire valve. Efficient Performance: Quickly inflates tires, reducing downtime and ensuring you get back on the road promptly. Versatile Application: Ideal for various inflatables beyond vehicle tires, such as sports equipment and inflatable toys. Additional Benefits: Heavy-Duty Construction: Built to withstand tough environments and frequent use. Safety Features: Includes overheat protection, ensuring the device operates safely under heavy loads. Whether you’re on a rugged trail or just need reliable tire maintenance, this air compressor offers both performance and convenience. What is the Adam’s Tire & Rubber Cleaner used for? What is the Tire & Rubber Cleaner Used For? Tire & Rubber Cleaner is designed to remove discoloration and dirt from various rubber surfaces efficiently. This versatile cleaner is perfect for: Tires: Quickly eliminates grime and restores the original black sheen. Rubber and Plastic Trim: Perfect for exterior and interior trims, giving them a renewed appearance. Rubber Floor Mats: Lifts dirt and stains, leaving your mats looking fresh and clean. Its powerful formula ensures that all these surfaces are cleaned thoroughly, enhancing your vehicle’s overall look. How can you prevent tailgate theft on a Tacoma? How to Prevent Tailgate Theft on a Tacoma Worried about tailgate theft on your Tacoma? You’re not alone. Tailgate theft is a common concern for truck owners, but there are several effective strategies to safeguard your vehicle. Locking Mechanisms Tailgate Locks: Investing in an aftermarket tailgate lock can provide an additional layer of security. These locks usually attach directly to your tailgate, making it harder for thieves to remove. Hitch Locks: Another option is to use a hitch lock. By securing the receiver hitch, you can make it more challenging for would-be thieves to detach the tailgate. Lockable Bed Covers: A lockable tonneau cover or bed cap can also deter theft. These covers not only protect the contents of your truck bed but also restrict access to the tailgate latch. Alarms and GPS Tailgate Alarm: A specialized alarm system can alert you when someone is tampering with your tailgate. These alarms often come with motion sensors and loud alerts to scare off potential thieves. GPS Tracking Devices: Installing a GPS tracker on your tailgate can help you recover it if it’s stolen. Some trackers come with geofencing features that alert you if the tailgate leaves a designated area. Physical Barriers Tailgate Protector Guards: Physical guards can be installed to cover the hinge area, making it difficult for thieves to remove the tailgate quickly. Cable Locks: These locks can be threaded through the tailgate and around a fixed point on the truck bed. They’re a visible deterrent and add another hassle for would-be thieves. Smart Habits Parking in Safe Areas: Always try to park your Tacoma in well-lit, busy areas. Thieves are less likely to strike where they can easily be seen. Secure Parking: When possible, use a garage or gated parking lot. The extra layer of security can be a significant deterrent. Regular Checks: Make it a habit to regularly check your tailgate and surrounding areas for any signs of tampering. Early detection can prevent theft. By combining these measures, you can significantly reduce the risk of tailgate theft on your Tacoma. Stay proactive and keep your valuable vehicle secure. What does the VIAIR Portable Compressor Kit include? What’s Included in the VIAIR Portable Compressor Kit? When you invest in the VIAIR portable compressor kit, you’re getting a comprehensive solution tailored for inflating larger tires efficiently. Here’s a detailed look at what comes in the package: 12V Portable Air Compressor: The heart of the kit, this robust compressor is designed to inflate tires up to 33 inches in diameter. It connects directly to your vehicle’s battery for the power it needs. Long Air Hose: A 16-foot air hose that gives you the flexibility to reach all your tires easily, even on larger vehicles. Powerful Motor: Capable of delivering up to 120 PSI, ensuring you have plenty of pressure to handle a variety of tire sizes. Battery Clamps with Inline Fuse: For easy and secure connection to your car battery, ensuring safety and reliability during operation. Air Chuck: A convenient, easy-to-use chuck ensures a tight seal on your valve stems, preventing leaks during inflation. Built-In Pressure Gauge: Provides accurate pressure readings so you can monitor and achieve the desired tire pressure without the need for separate tools. Carry Bag: A durable, compact carry bag for easy storage and portability, keeping your kit organized and ready to use whenever needed. With this comprehensive kit, you have everything required to maintain optimal tire pressure, enhancing your vehicle’s performance and ensuring a smoother, safer ride. What is the Pop & Lock Manual Tailgate Lock used for? The Pop & Lock Manual Tailgate Lock is designed to enhance the security of your vehicle’s tailgate. This device ensures that the contents of your truck bed stay safe, especially when you’re transporting valuable items. Key Uses: Preventing Theft: By securely locking your tailgate, it deters potential thieves from accessing the contents of your truck bed. Enhanced Vehicle Security: Helps in safeguarding any cargo you might be transporting, providing peace of mind whether you are parked in a busy urban area or a secluded spot. Compatibility: Tailored to fit specific vehicle models, ensuring a seamless installation and integrated look. Features: Manual Operation: Unlike electronic locks, this one operates manually, giving you direct control over the locking mechanism. Bolt-Codeable Technology: Allows the lock to be coded to your vehicle’s existing key, eliminating the need for separate keys and making it more convenient. Durable Design: Built to withstand the elements and tough usage conditions, ensuring long-lasting protection for your tailgate. In summary, the Pop & Lock Manual Tailgate Lock is essential for anyone looking to boost their vehicle’s security, protect their cargo, and enjoy greater peace of mind. It is a practical, reliable solution for safeguarding your truck bed from unauthorized access. Where is the oil filter located on a 2016 Tacoma? Locating the Oil Filter on a 2016 Tacoma Properly maintaining your vehicle can extend its lifespan and ensure peak performance. One essential task is regularly changing the oil filter. If you own a Toyota Tacoma and need to locate the oil filter, here’s a straightforward guide. Step-by-Step Guide: Preparation: Tools Needed: You will need an oil filter wrench and a drain pan. Safety First: Ensure the vehicle is parked on a flat surface and the engine is cool. Vehicle Elevation: Optional: If needed, use a jack to lift the front of the Tacoma, securing it with jack stands to provide better access to the underside. Locate the Oil Filter: Engine Bay Access: Open the hood of your Tacoma and locate the engine compartment. Typically, the oil filter in the 2016 model is positioned near the front of the engine. Under the Vehicle: For a more precise approach, lie on your back and slide under the front end of your Tacoma. You will find the oil filter situated behind the front bumper, slightly offset towards the passenger side. It is positioned at a slight angle, making it accessible for removal. Removal Process: Drain Pan Placement: Place a drain pan beneath the oil filter to catch any residual oil. Filter Removal: Use your oil filter wrench to carefully unscrew the filter. Turn it counterclockwise to remove it. Replacement: New Filter Application: Prepare the new oil filter by applying a thin layer of oil to the gasket. This ensures a good seal and makes future removal easier. Installation: Screw the new oil filter in place by turning it clockwise until it’s snug. Then, give it an additional three-quarters turn. By following these steps, you can easily find and replace the oil filter on your 2016 Tacoma, ensuring your vehicle remains in top condition. Regular maintenance helps prevent potential issues and can save you money in the long run. What is the Genuine Toyota Parts Terminal Repair W/W used for? What is the Terminal Repair W/W (82998-12440) Used For? The Terminal Repair W/W (82998-12440) is a crucial component designed to ensure the efficient operation of your vehicle’s electrical systems. This terminal repair part plays a significant role in: Key Functions: Electrical Connectivity: Ensures a stable and reliable connection within the wiring harness. This is vital for maintaining the proper function of various electrical systems in your vehicle. Repair and Replacement: Ideal for fixing damaged or corroded terminals, restoring the integrity of the electrical circuits and preventing potential malfunctions. Performance Enhancement: By maintaining optimum electrical flow, it helps in preventing voltage drops and intermittent electrical issues, ensuring your vehicle runs smoothly. Applications: Lighting Systems: Keeps headlights, taillights, and interior lighting functioning correctly. Engine Control Units (ECUs): Ensures that the ECUs receive the necessary signals, which is critical for engine performance. Accessories Connection: Facilitates the proper connection of various vehicle accessories like GPS units, audio systems, and more. Benefits: Reliability: Provides a dependable electrical connection, reducing the risk of operational failures. Durability: Made from high-quality materials for long-lasting performance, even in harsh conditions. Compatibility: Designed to fit specific vehicle models, ensuring seamless integration with your vehicle’s existing wiring systems. In sum, the Terminal Repair W/W (82998-12440) is essential for maintaining the integrity and performance of your vehicle’s electrical systems, making it a vital component for both routine maintenance and specific repair tasks. Is a 2006 Tacoma worth buying? “For $25K, it was in decent condition,” he says. “All it needed was a little TLC but overall it was a good starting platform.” So far, some of his favorite getaway destinations include some of the forest areas that lie just north of home in the outskirts of the Bay Area, including Slick Rock (not to be confused with the popular ‘80s rapper), Eagle Lakes, Deer Valley and as far out as Joshua Tree. His longest trip took Alex to Grand Canyon North Rim, where it wasn’t just a long drive to get there, but a couple hundred miles were spent off-road driving through the area. Is a 2006 Tacoma Worth It? When considering whether a 2006 Tacoma is worth buying, it’s important to look at various factors: Condition and Price: For $25K, buyers can find models in decent condition, though some may require a bit of tender loving care (TLC). Versatility: Owners have highlighted the Tacoma’s versatility, making it ideal for both urban commutes and off-road adventures. Reliability: The 2006 Tacoma is often praised for its reliability, with many owners reporting minimal issues even after years of use. Community Feedback: Discussions in various automotive forums reveal a strong community of satisfied owners who share tips and advice on maintenance and modifications. User Experiences So far, some of his favorite getaway destinations include forest areas just north of his home in the outskirts of the Bay Area, such as Slick Rock, Eagle Lakes, Deer Valley, and Joshua Tree. His longest trip took Alex to Grand Canyon North Rim, where it wasn’t just a long drive to get there, but a couple hundred miles were spent off-road driving through the area. These examples highlight the Tacoma’s capability and durability in various terrains and conditions. Final Thoughts In conclusion, a 2006 Tacoma can be a worthwhile investment for those seeking a reliable and versatile vehicle. The combination of personal experiences and community feedback underscores its value, making it a solid choice for both everyday use and adventurous getaways.
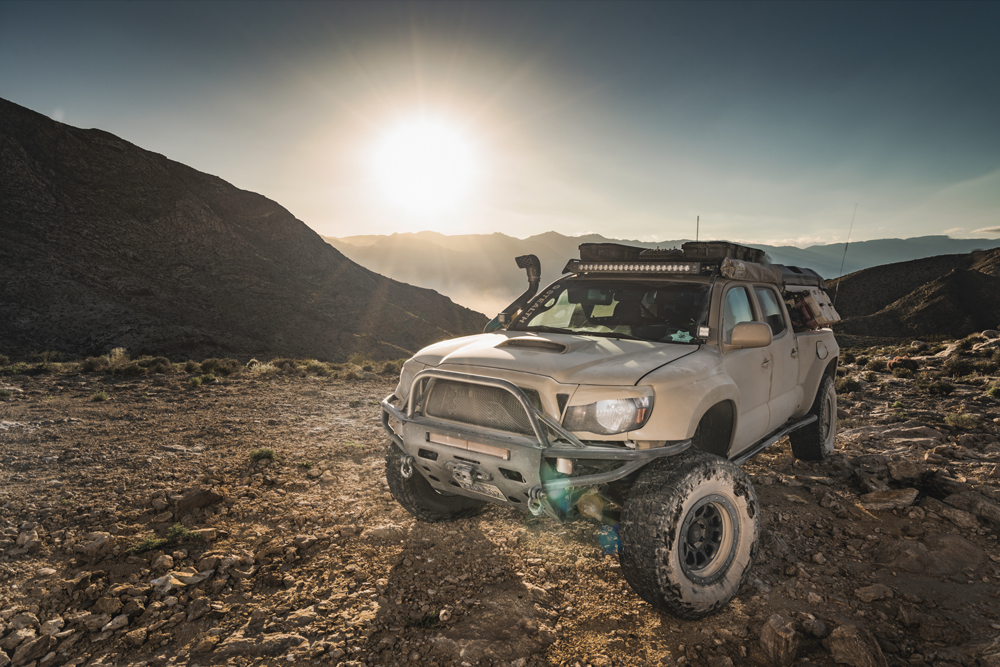

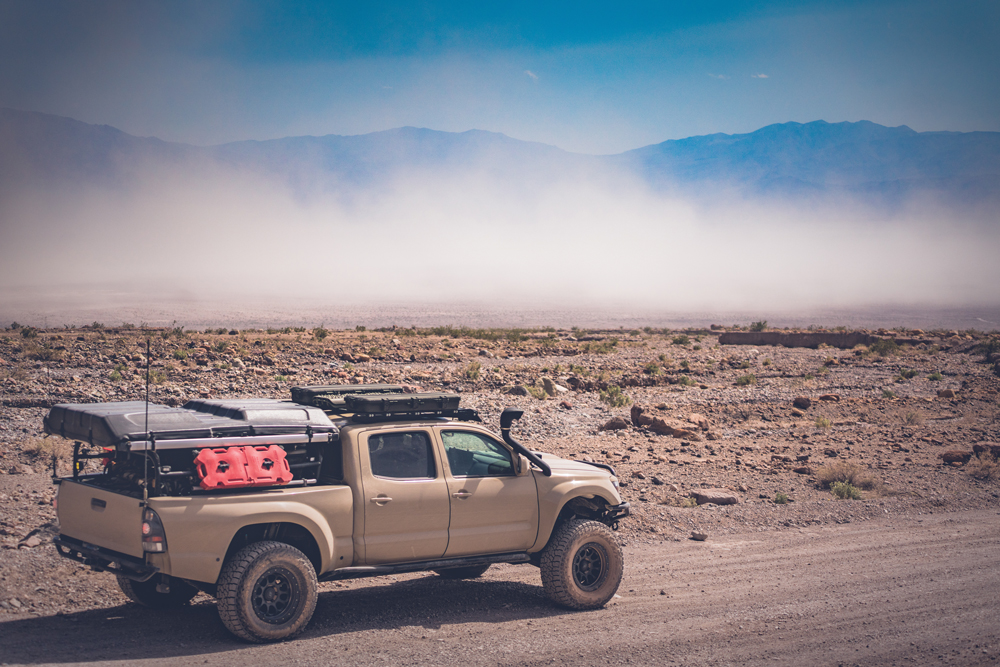
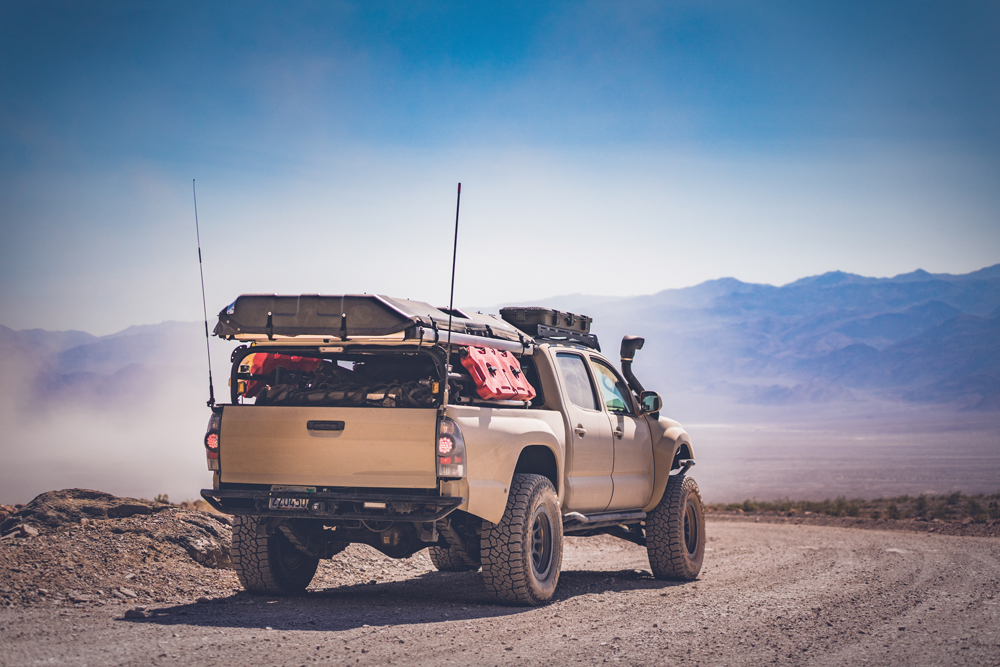
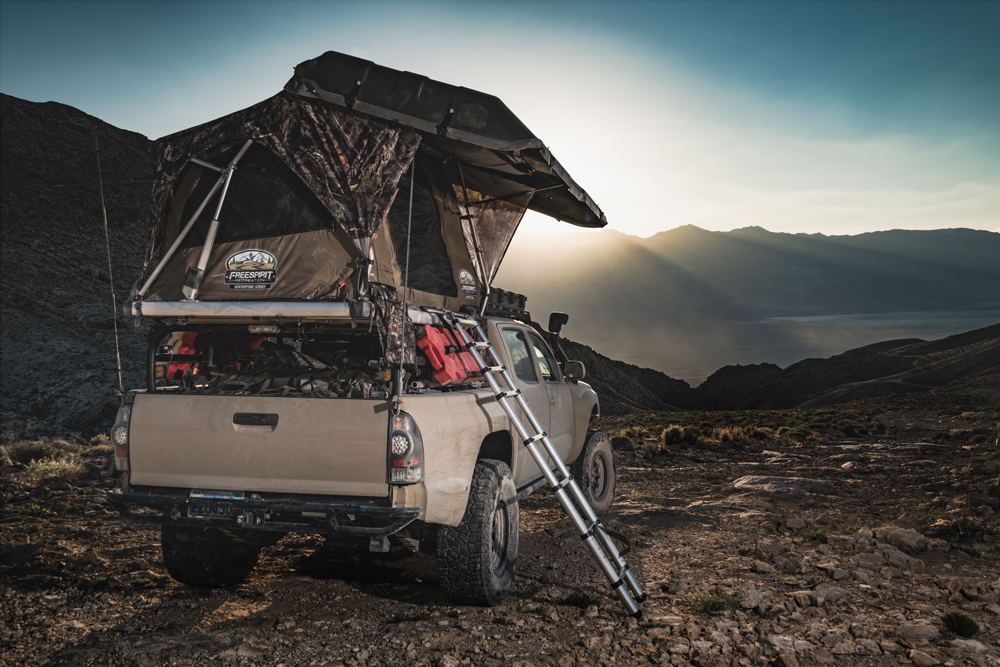
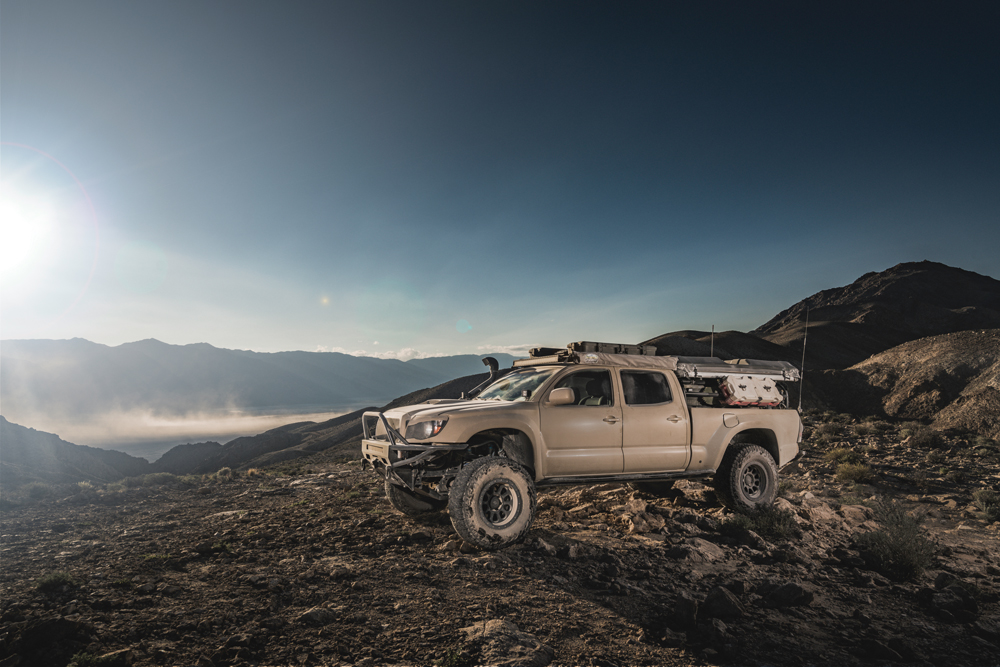

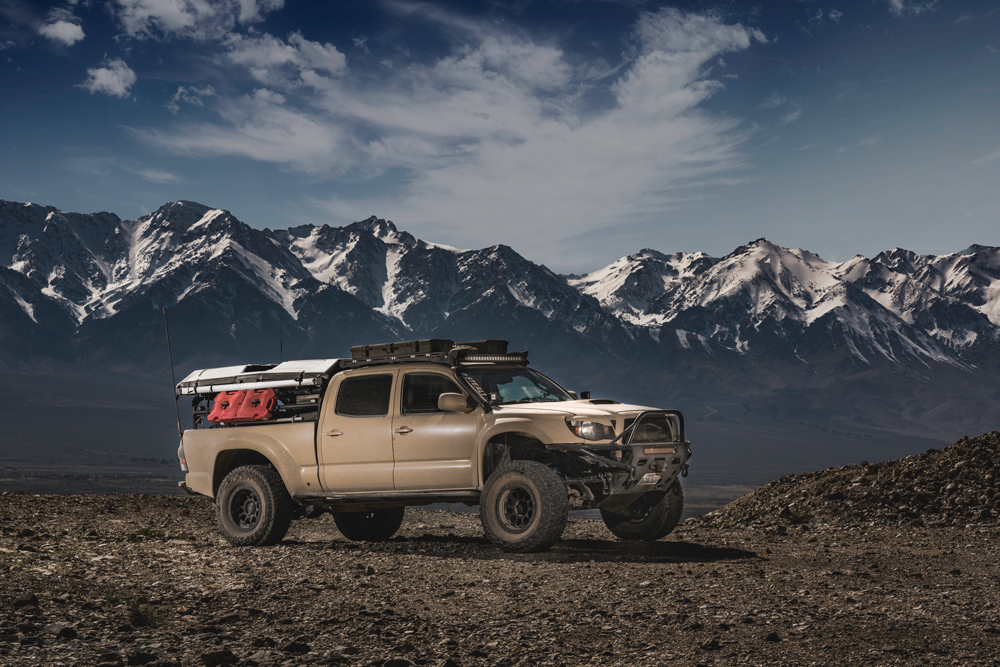
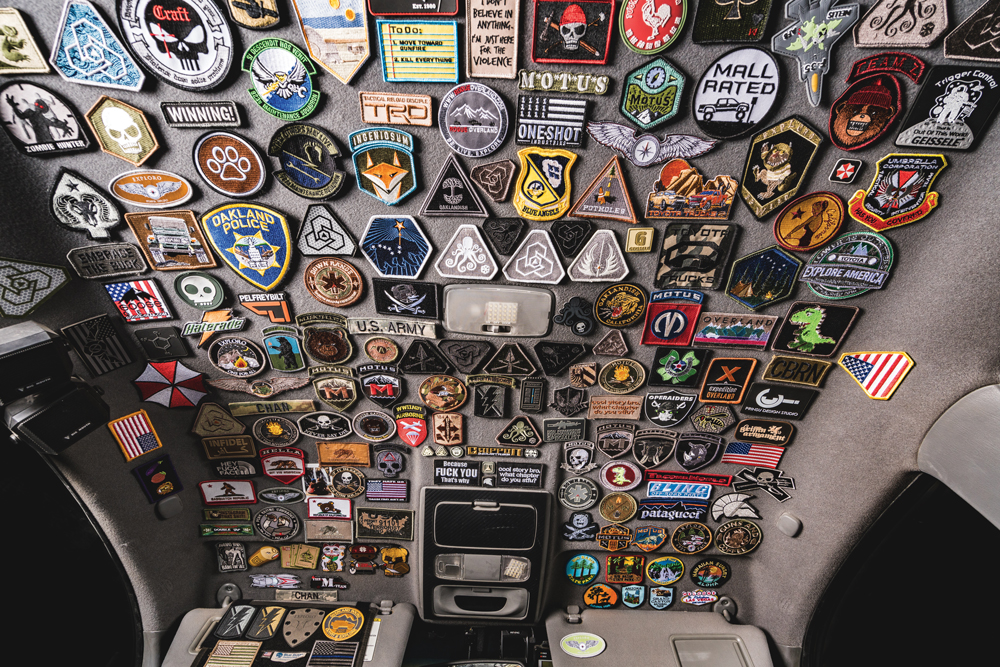
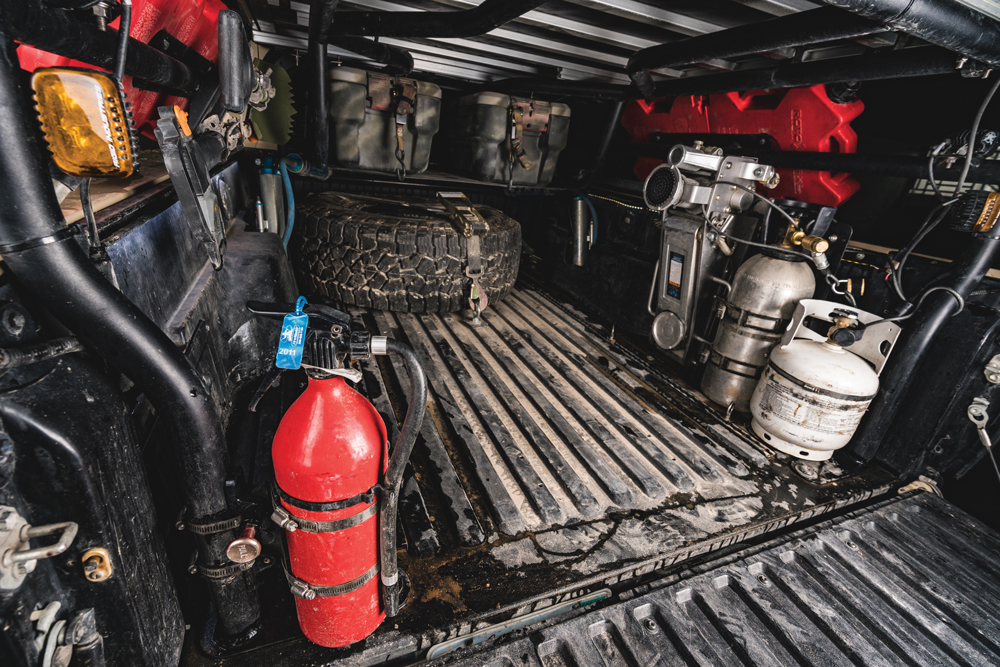
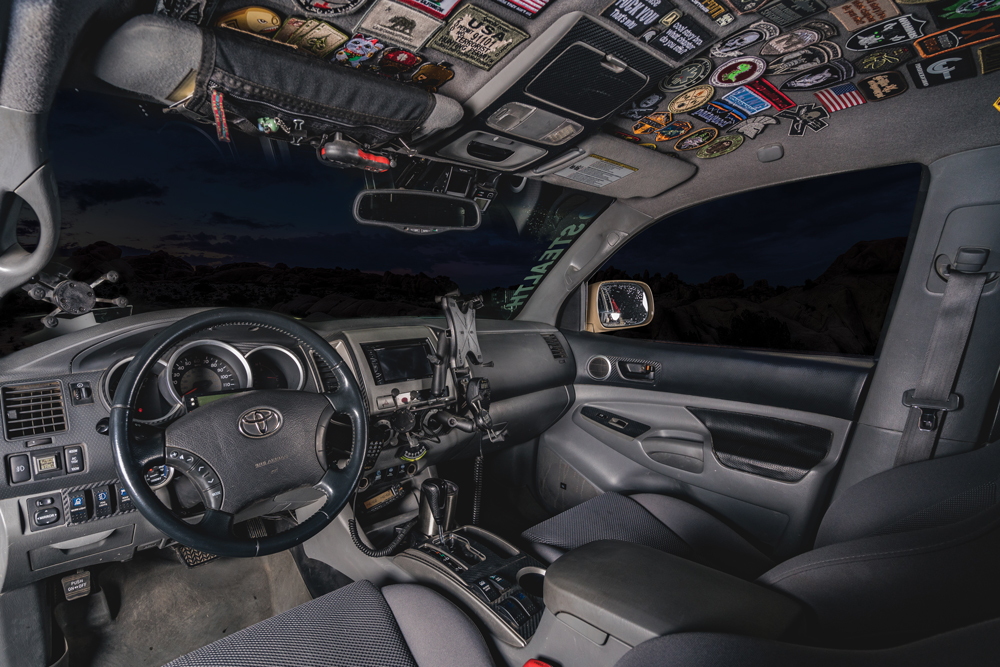
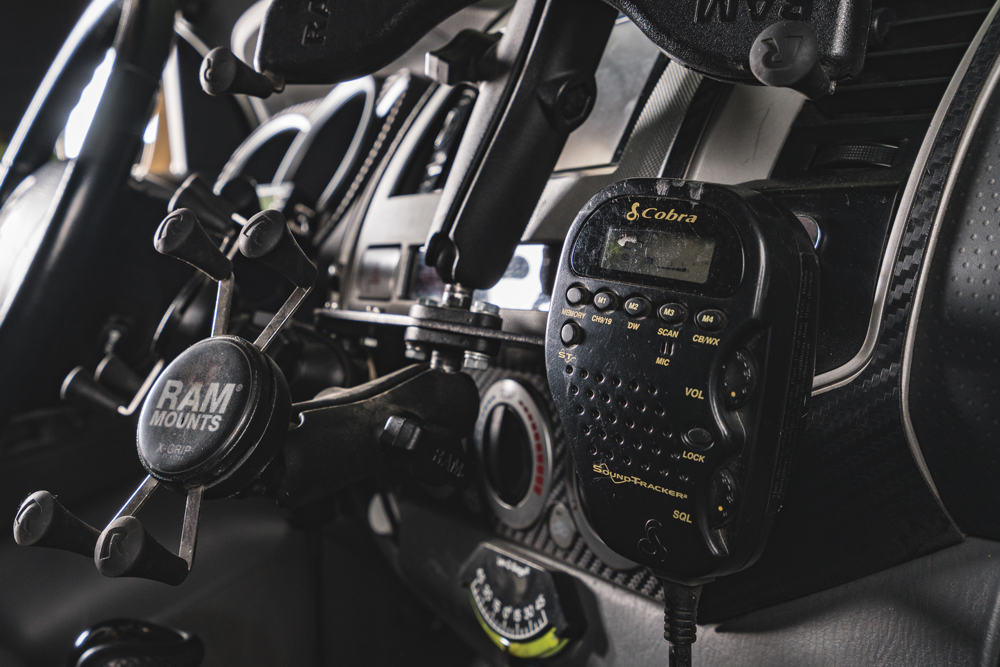

Features New Products Putco’s VentureTEC Overland Modular Cargo System A Look Into the Development of Putco’s VentureTEC Overland Modular Cargo System Founded in 1969, Putco began life as a company solely focused on the […] Tread Staff March 17, 2020
Bronco Features Bloodshark: A Rock-Crawling 1992 Ford Bronco Transformation Blake Wilkey’s Solid-Axle Swapped ’92 Ford Bronco when we heard that Blake Wilkey of Urban Assault video fame was taking a quick pause from shredding […] John Mata Jr. September 11, 2024
Features The ‘90s are Back - Classic Vehicles In the age of everyone hating millennials for putting avocado on everything, we can still count on trends coming and going—and one thing that always […] Tread Staff April 22, 2019
Camp Gear Clothing Gear Box: Necessities for Outdoor Living Supplies for life off the beaten path Campers, overlanders and vanlifers alike all know there’s more to outdoor living than a fantastic rig. So, sustain […] Jerry Tsai June 15, 2022